Account Plan Installation for Existing Customers
- Anna Madajova
- David Depman
IMPORTANT
Your Organization must be on version 1.228.0 or above and have Full Suite ClosePlan licenses.
1. Upgrade to the latest version of ClosePlan
Use the install link provided by the ClosePlan team
or
Provide Account Login Access to The Sales Productivity Company s.r.o. so that we can do the installation and configuration for you.
Instructions to grant login access.
2. Contact Technical Support to enable the Account Planning for your Organization
Send an e-mail to support@people.ai with your Organization ID to enable Account Planning
Instructions to find your Organization ID
- We will reply with confirmation when Account Planning has been enabled.
3. Add the Account Plan Tab and Component to the Account Page Layout
Configure in Lightning:
- Go to Account Tab > open any Account
- From the gear
 icon menu select Edit Page to open Lightning App Builder
 - In the page layout work space area, click on any existing Tab (e.g. Related, Details...)
- On the right side panel click the Add Tab button to create a new tab
- Click on the new tab (It will be named 'Details' by default) > under Tab Label select Custom > in the Custom Label field enter Account Plan > click Done
- In the page layout work space area, the new 'Account Plan' tab will appear > click on it
- Go to the left panel menu and in the section Custom - Managed find ClosePlan Account Plan
- Drag it into the Account Plan tab layout
- Save the page
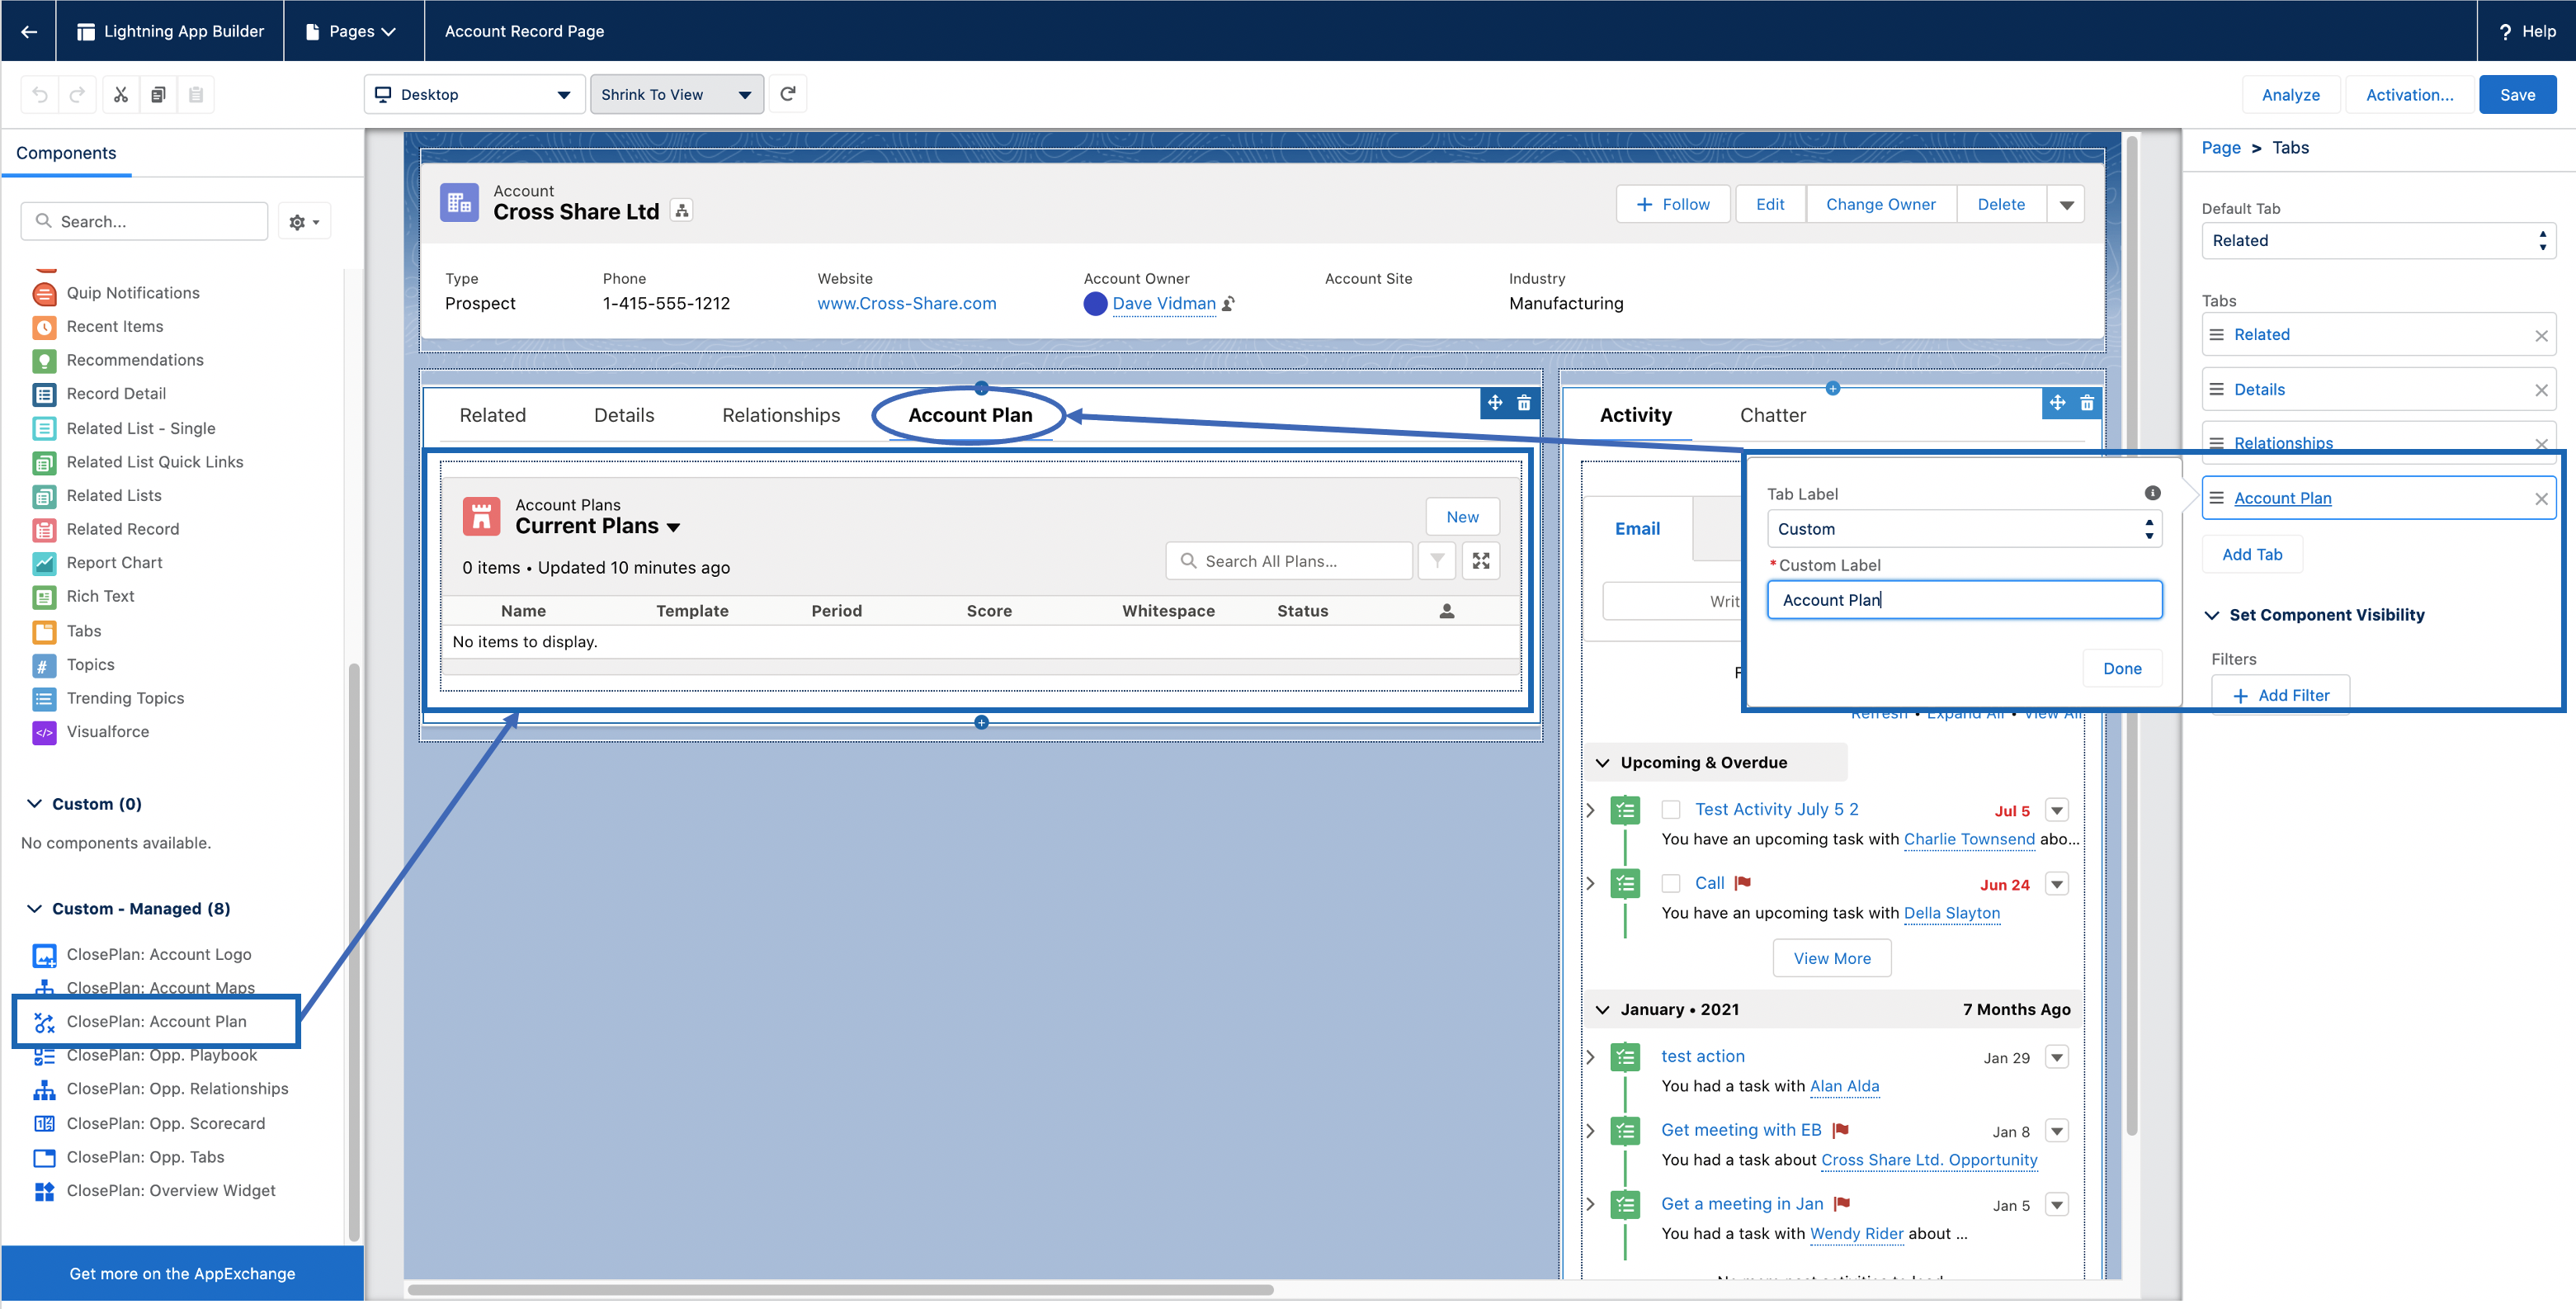
NOTE: You may be prompted to activate the page > click Assign as Org Default > Save
Configure in Classic:
- Go to Quick Find / Search > search for Account
- Select Page Layouts and open the page to which you want to add Account Plan
- Note: Each Page Layout must be configured individually
- Select Visualforce from the top scroll menu
- Click and Drag Section from the component section and drag it to the layout
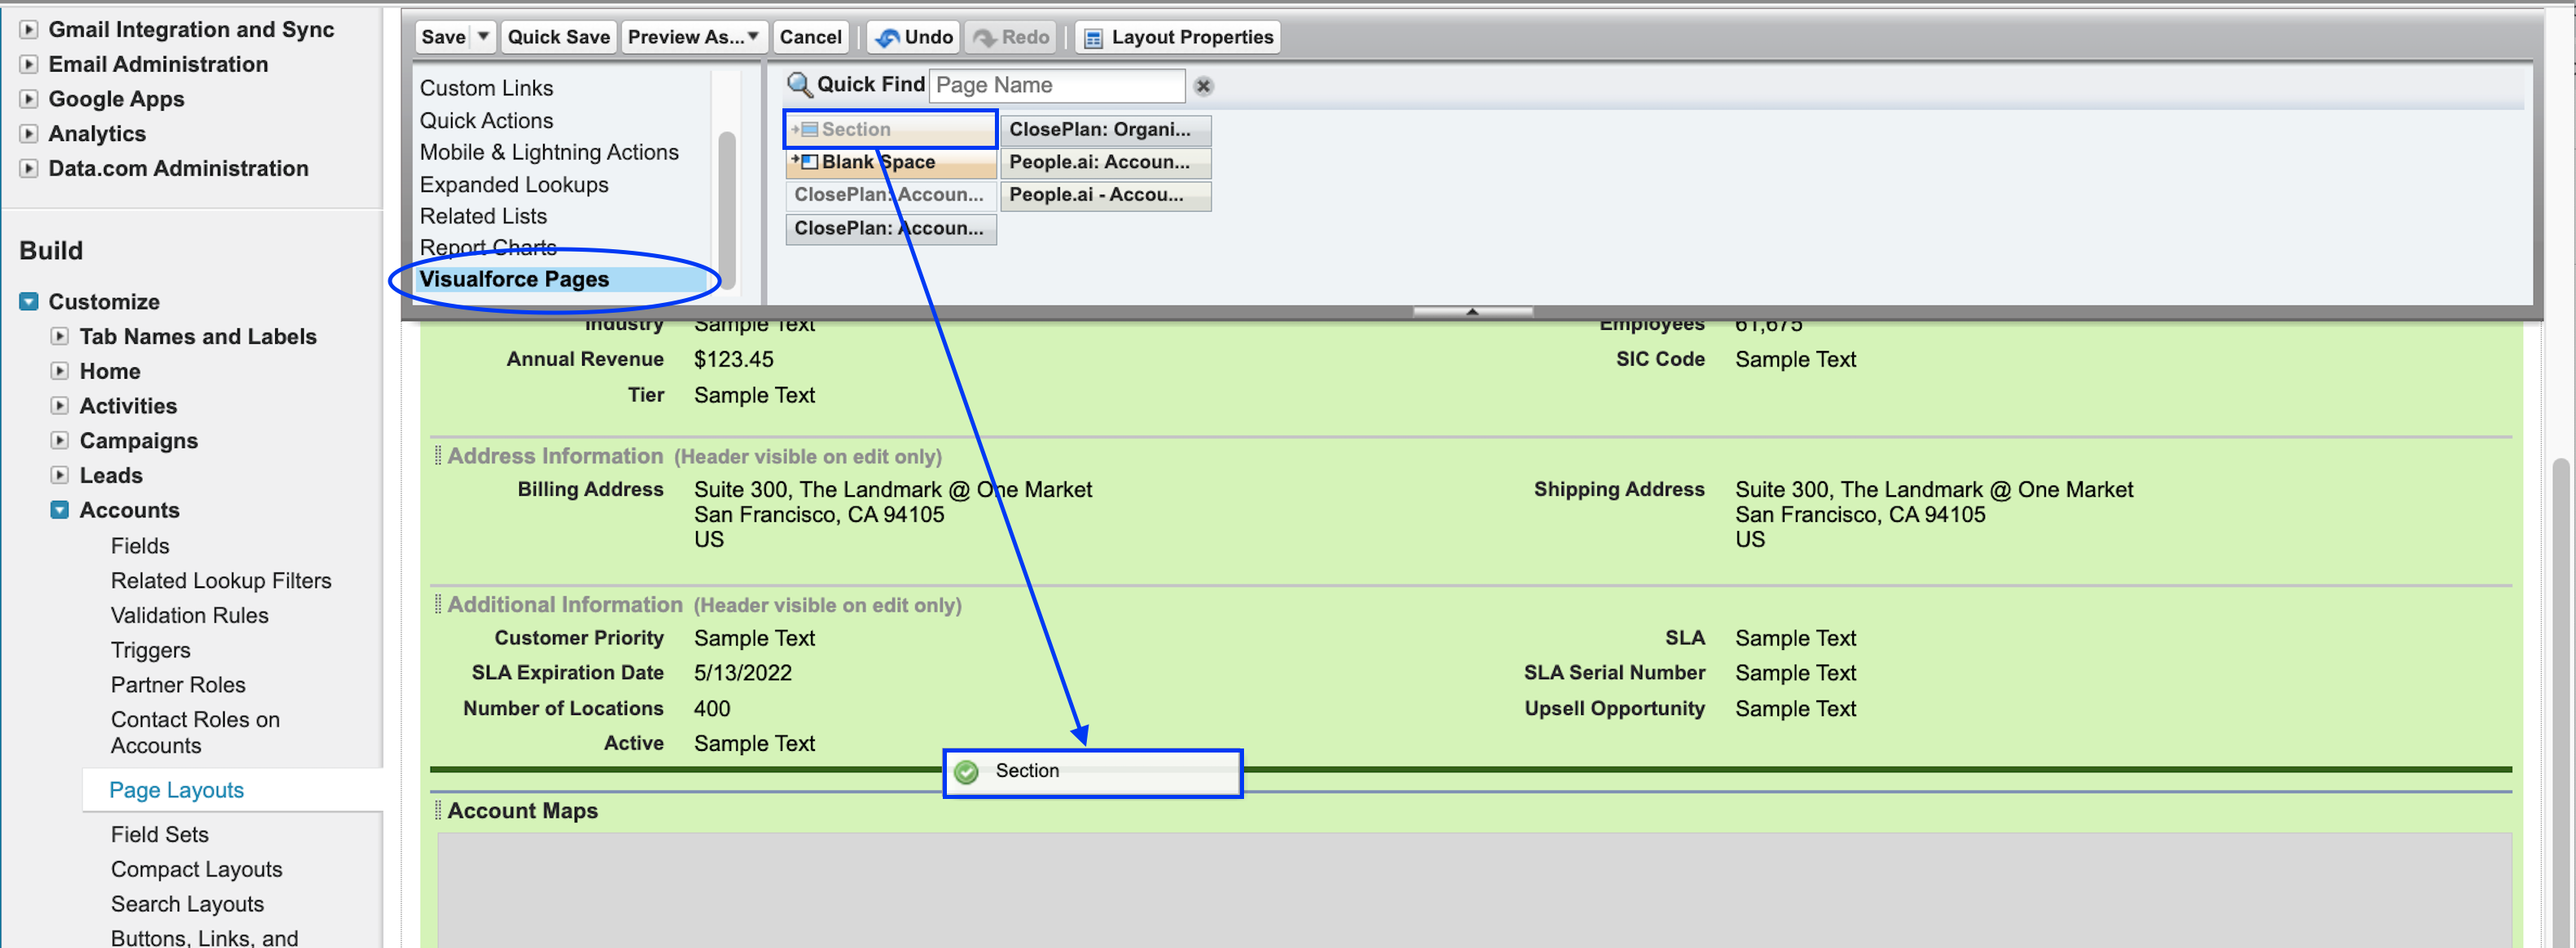
- For Section Name enter: ClosePlan Account Plan
- Under Layout, select One Column
- Click OK
- From the component section, select the ClosePlan - Account Plan component and drag it to the newly created component space
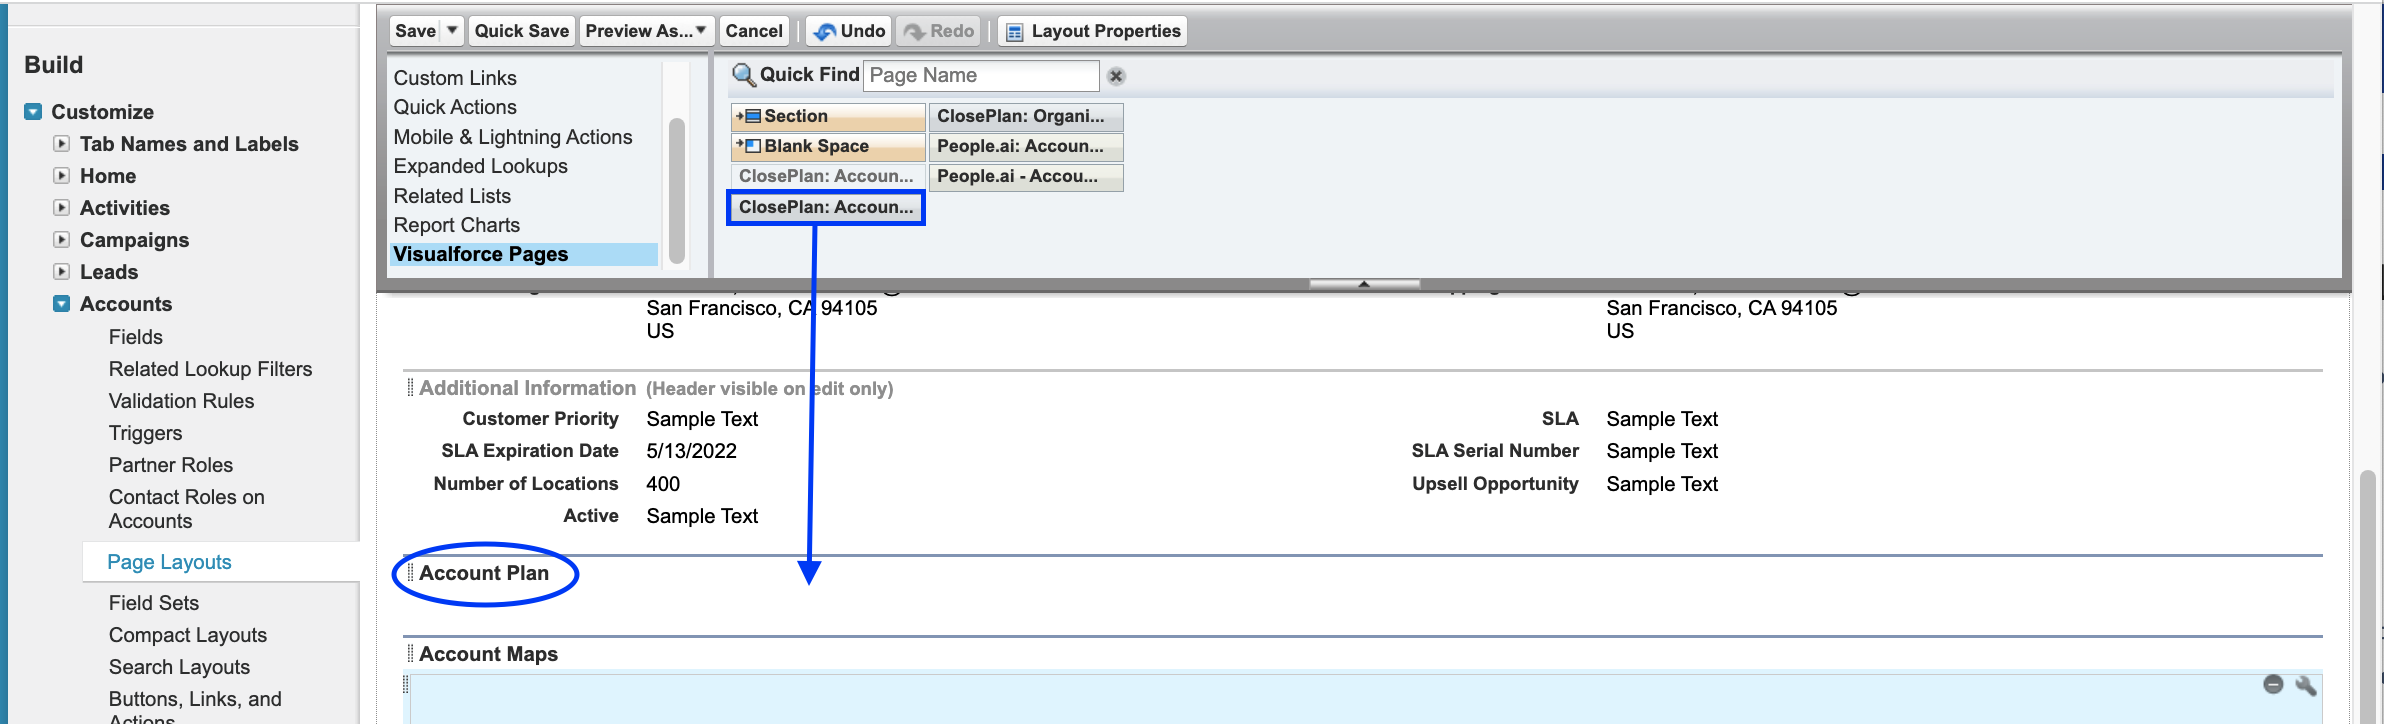
- Click on the Properties icon in the top right of the newly created component section
- For Height, enter 600
- Tick Show scrollbars
- Click OK
- Save the page
4. Re-configure Permission Sets in the User Manager
Go to ClosePlan Admin tab > User Manager
Click on the Configure button to update Permission Set Configuration
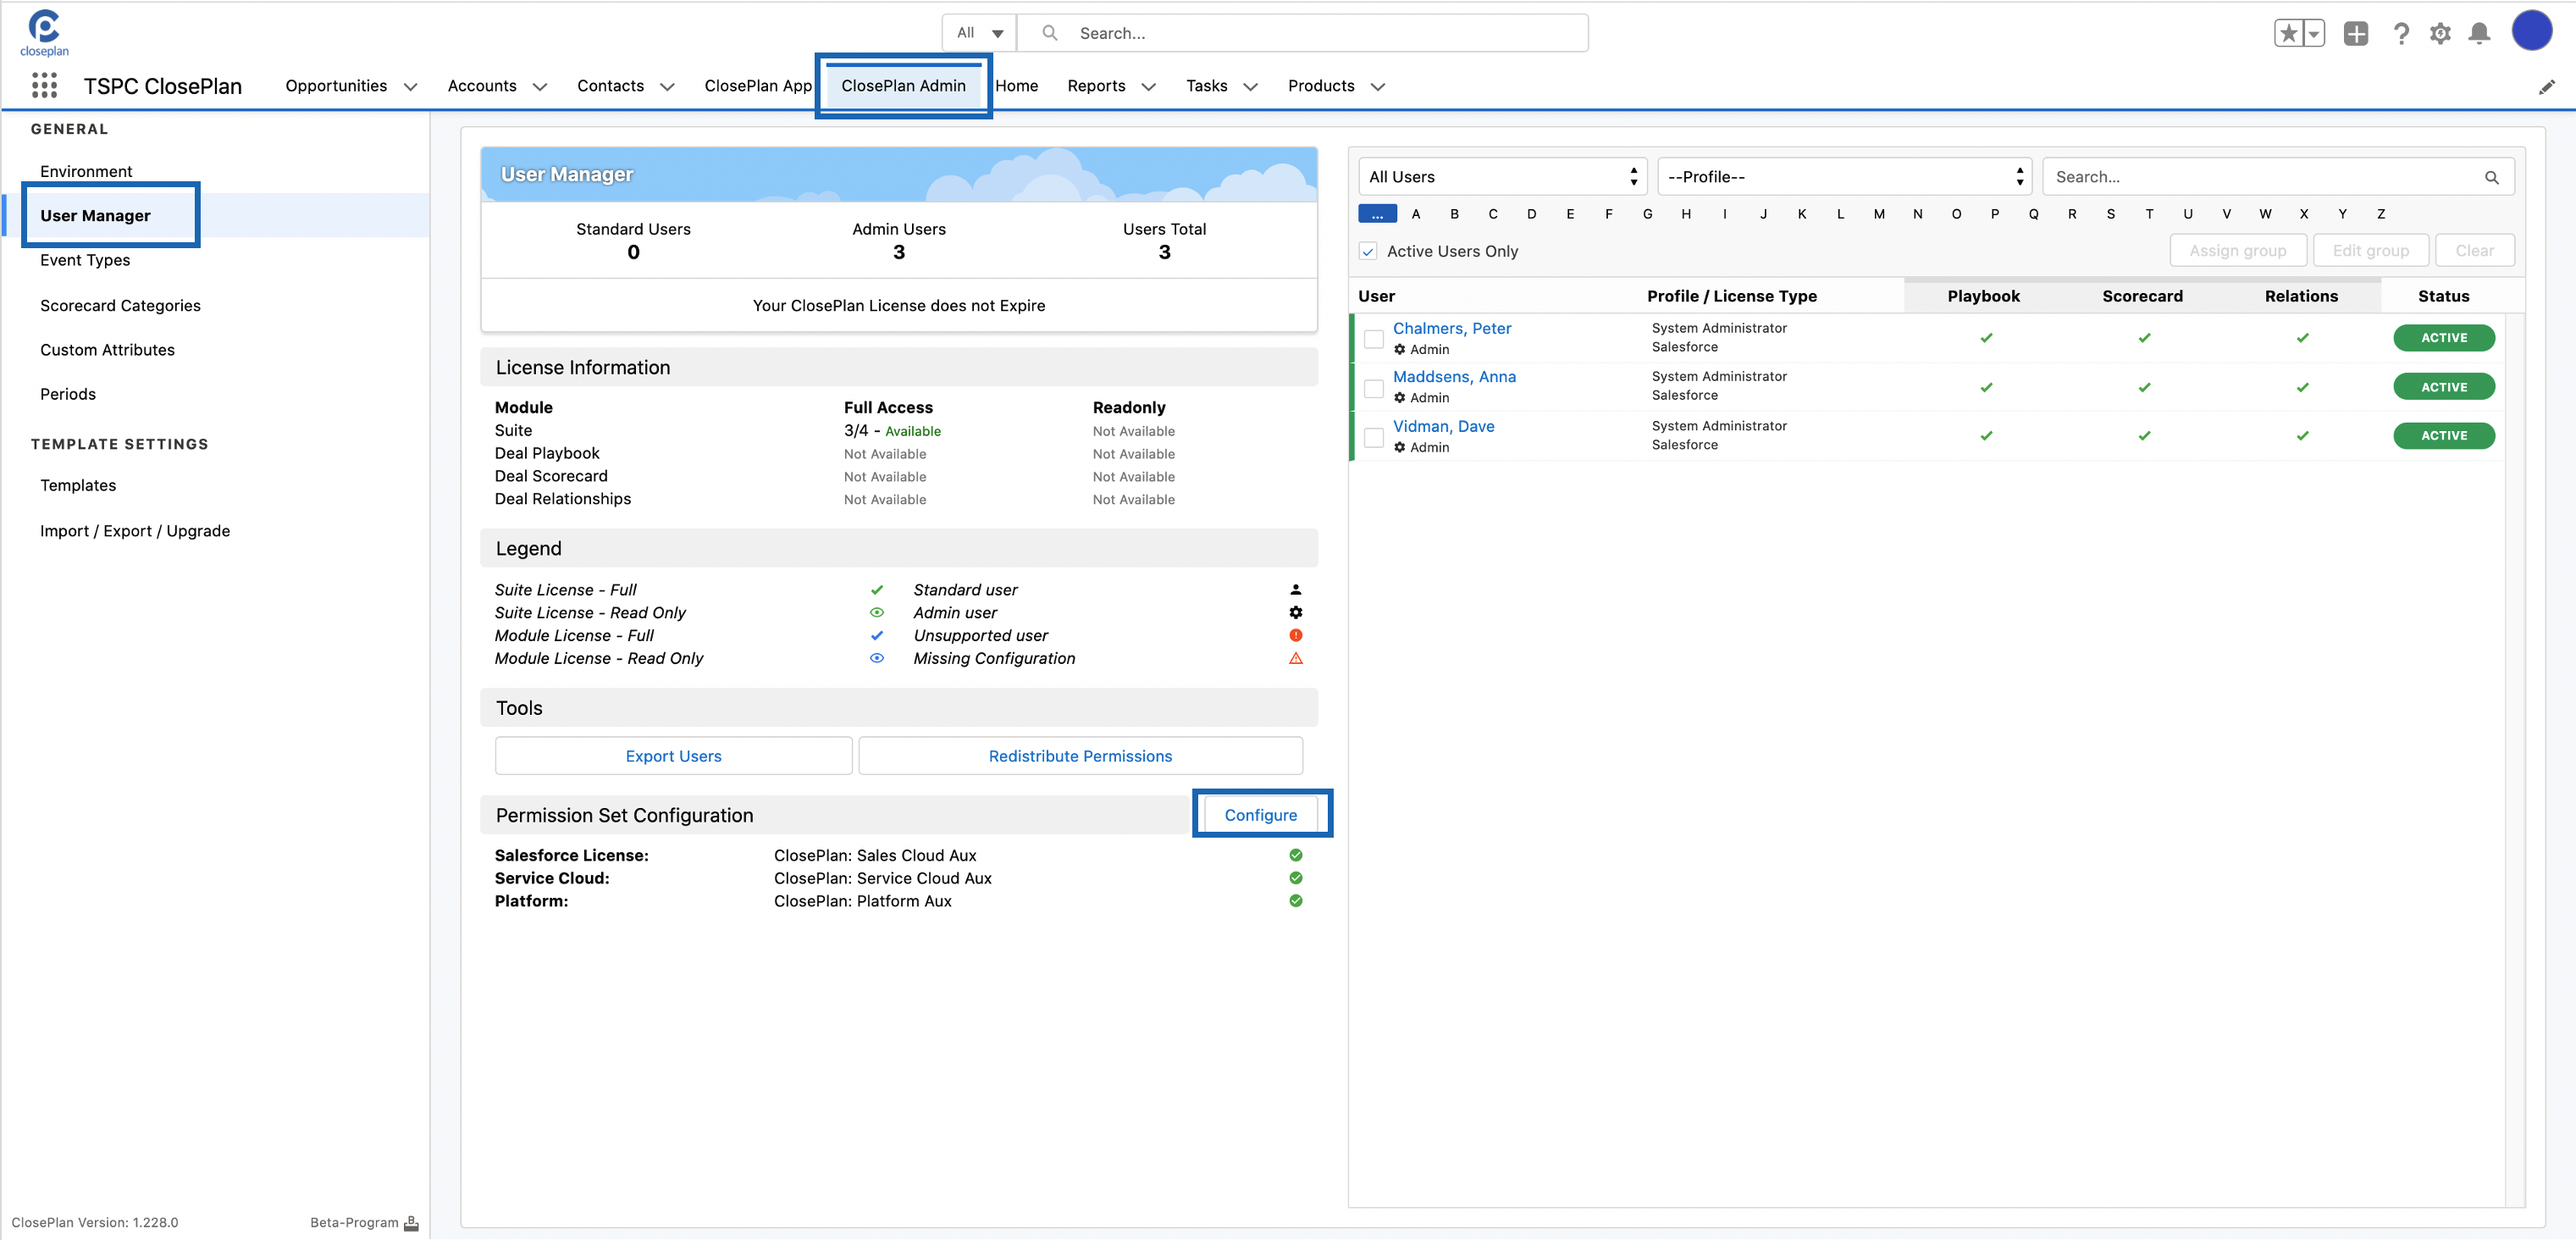
Click on Configure All Available (recommended) or on the items you choose.

Done!