ClosePlan can be configured for Lightning Experience, Classic or both. By default, ClosePlan is installed with all configurations set except Layout configurations.
Account Page Layout Configuration - Add Relationships Map
Configure in Lightning:
- Go to Account Tab > open any Account
- From the gear
 icon menu select Edit Page to open Lightning App Builder
 - In the page layout work space area, click on any existing Tab (e.g. Related, Details...)
- On the right side panel click the Add Tab button to create a new tab
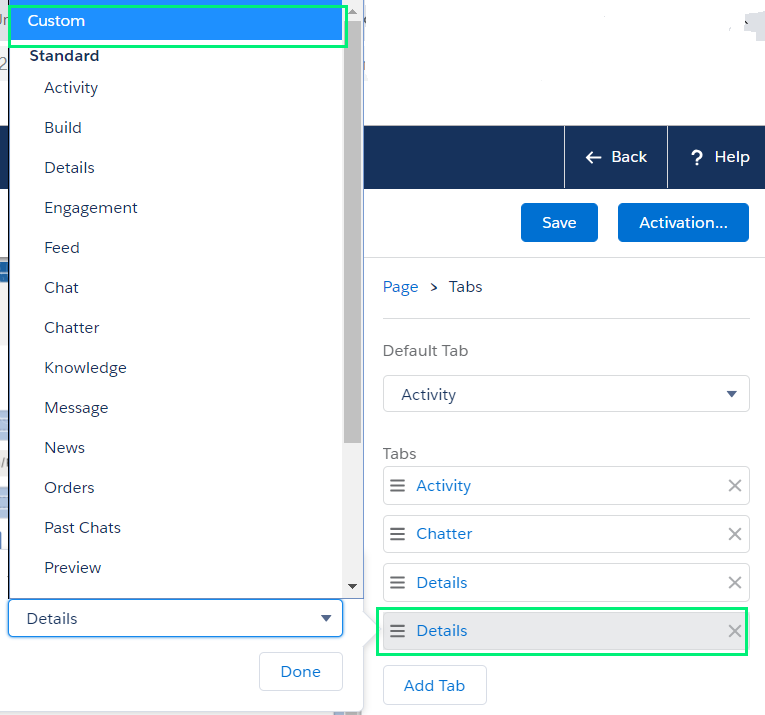
- Click on the newly added tab > On the right panel, Under Tabs click in the new Tab Label > select Custom > in the Custom Tab Label enter Relationships > click Done
- In the page layout work space area, the new 'Relationships' tab will appear > click on it
- Go to the left panel menu and in the section Custom - Managed find ClosePlan: Acc.Map List
- Drag it into the Relationships tab layout
- Save the page
NOTE: You may also need to activate the page by clicking on Activate button > click Assign as Org Default > Save

Configure in Classic:
- Go to Setup > on the left panel, under Build open Customize > Accounts > Page Layouts
- Click Edit by your desired Account Layout
- In the top scroll menu, click on Visualforce Pages
- Drag
 down to the Account Detail layout or where you wish to have it

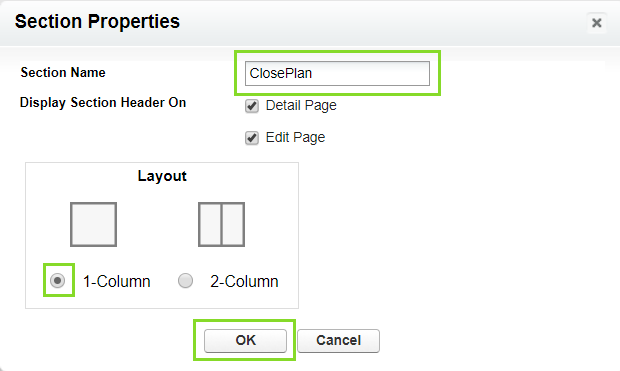
- In the Section Name enter ClosePlan Relationships > select 1-Column > click OK

- Drag the
 down into the newly created section - ClosePlan Relationships

- Click on the properties icon

- For Height enter e.g. 350
- Tick Show scrollbars and Ok

- Save it!

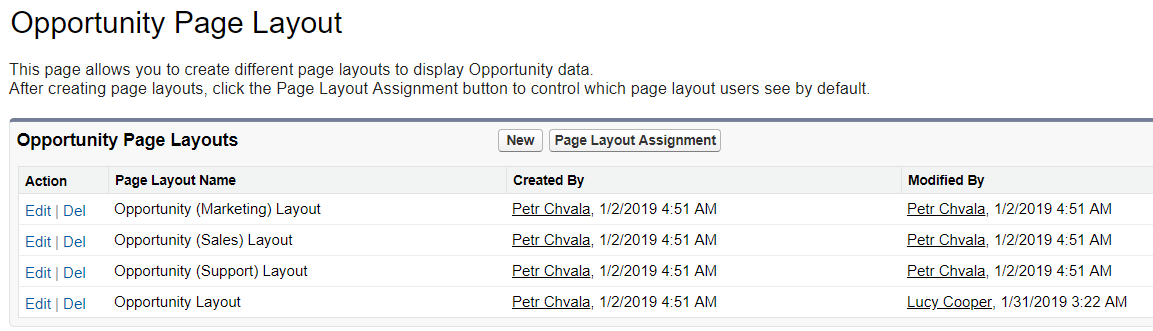
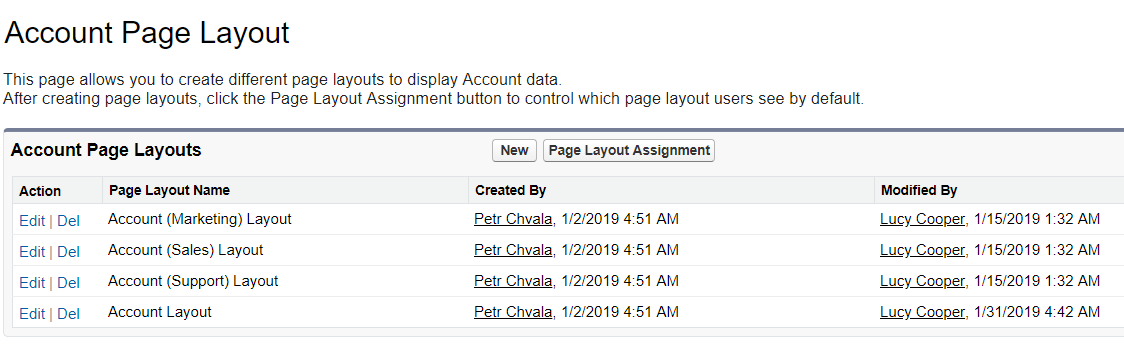
If there are more Account layouts in your organization, you need to configure each separately.
Opportunity Page Layout Configuration - Add ClosePlan Overview, Playbook, Scorecard and Relationships
NOTE
The ClosePlan standalone application does not require any additional configuration.
However, we recommend that you add the Opportunity widget to your Opportunity layout. The Opportunity Widget helps users easily determine if there is a ClosePlan created for the opportunity record and its progress.
To access standalone app: Open App Manager![]() > select TSPC ClosePlan > open ClosePlan App tab
> select TSPC ClosePlan > open ClosePlan App tab
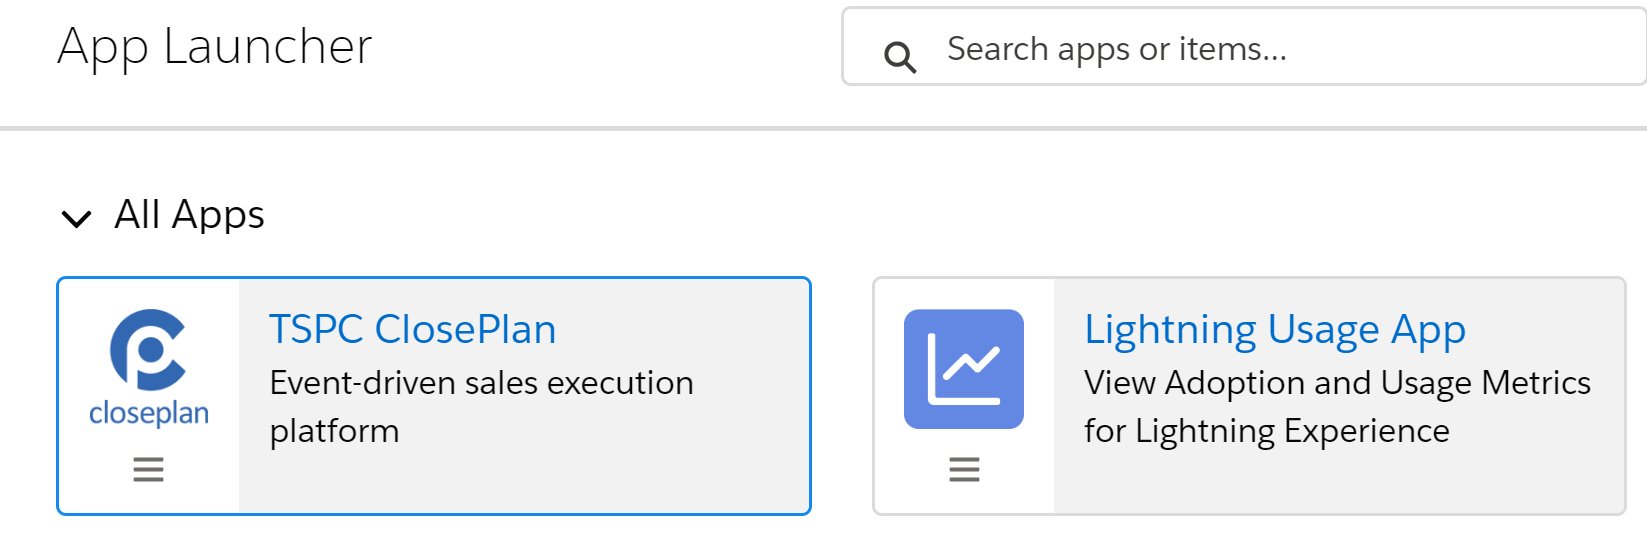
(Alternatively, you can add each tab directly to your App Manager apps from Setup > App Manager)
Adding ClosePlan Overview widget in Lightning

- Go to Opportunity Tab and open any Opportunity
- From the gear
 icon menu select Edit Page to open Lightning App Builder
 - On the left panel menu find Custom - Managed > ClosePlan: Opportunity Overview (TSPC)
- Drag it into the layout - preferably to the top of the narrow column on the right
- Click Save
NOTE: You may also need to activate the page by clicking on the Activate button > click Assign as Org Default > Save

Add ClosePlan Features (Playbook, Scorecard, Relationships) in Lightning
The following steps will create our standard default view.
Please note that this configuration can be customized to match your preferences.
NOTE: Before adding ClosePlan features, confirm the features purchased in the line items of your ClosePlan Customer Order Form. Accordingly, configure only those components.
- Go to Opportunity Tab and open any Opportunity
- From the gear
 icon menu select Edit Page to open Lightning App Builder
 - In the page layout work space area, click on any existing Tab (e.g. Related, Details...) > on the right side panel click Add Tab to create a new tab
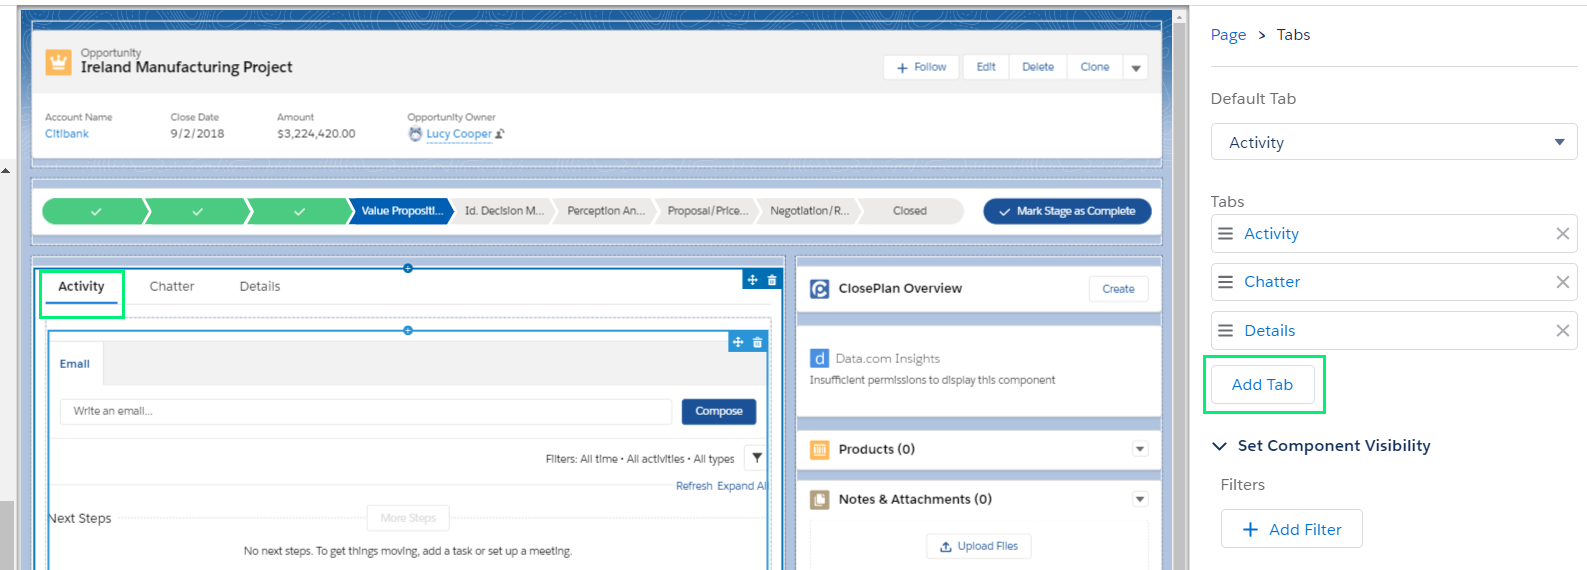
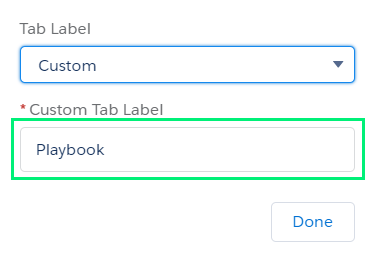
- Click on the newly added tab > in the Tab Label menu select Custom > in the Custom Tab Label enter the component name i.e. Playbook > click Done
- Repeat this step to add another components
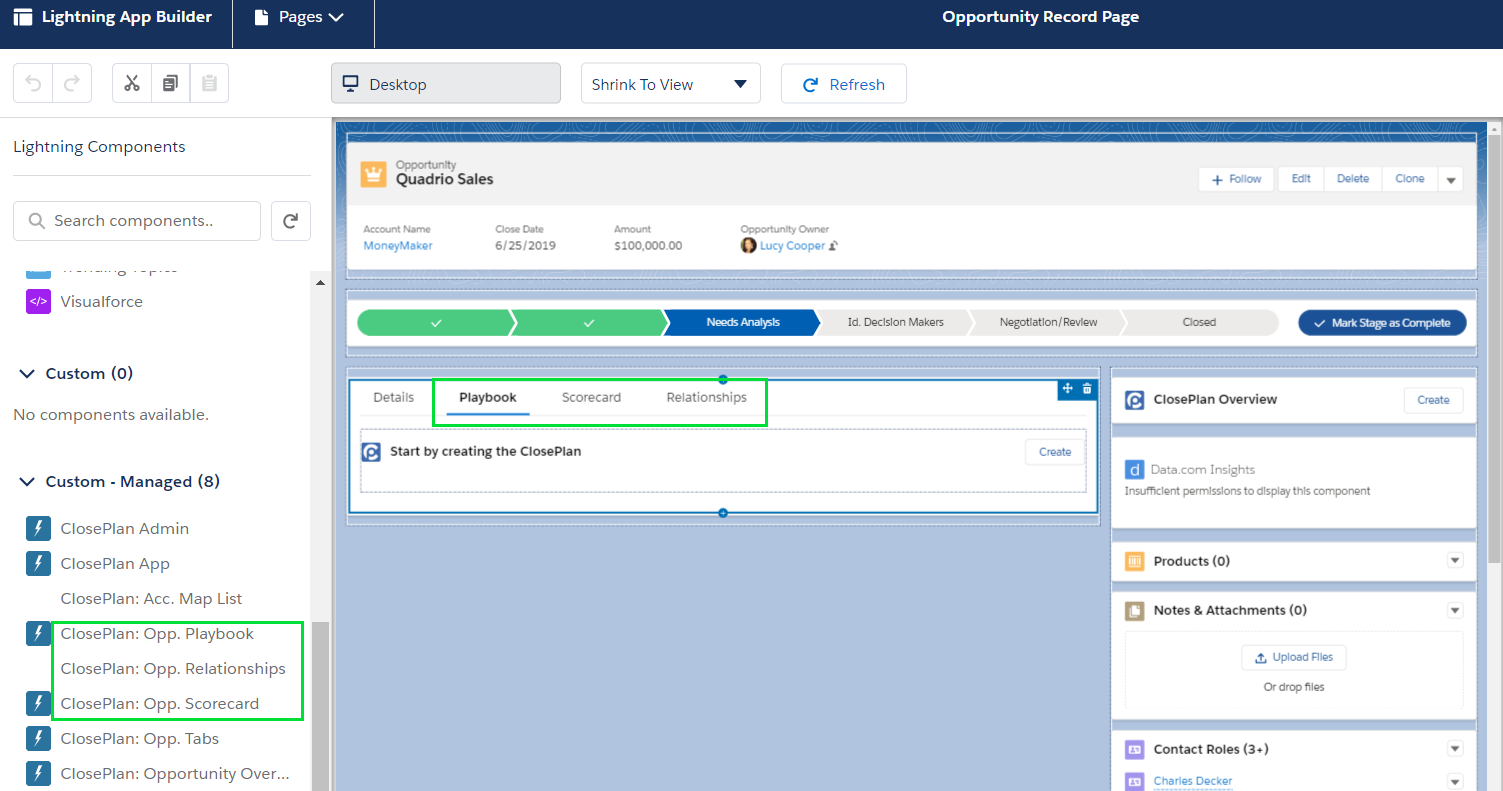
- Click one of the newly created tabs > Go to the left panel menu and in the section Custom - Managed find the ClosePlan components needed, and drag them into the correct tab space according to the following
Tab Label | Component Name |
|---|---|
| Playbook | ClosePlan: Opp. Playbook |
Scorecard | ClosePlan: Opp. Scorecard |
| Relationships | ClosePlan: Opp. Relationships |
- Click Save
- NOTE: You may also need to activate the page by clicking on Activation button > click Assign as Org Default > Save
Add ClosePlan Features in Classic
NOTE: Before adding ClosePlan features, confirm the features purchased in the line items of your ClosePlan Customer Order Form. Accordingly, configure only those components.
- Go to Setup > on the left panel under Build open Customize > Opportunities > Page Layouts
- Under Action, Click Edit for the Page Layout Name you want to edit
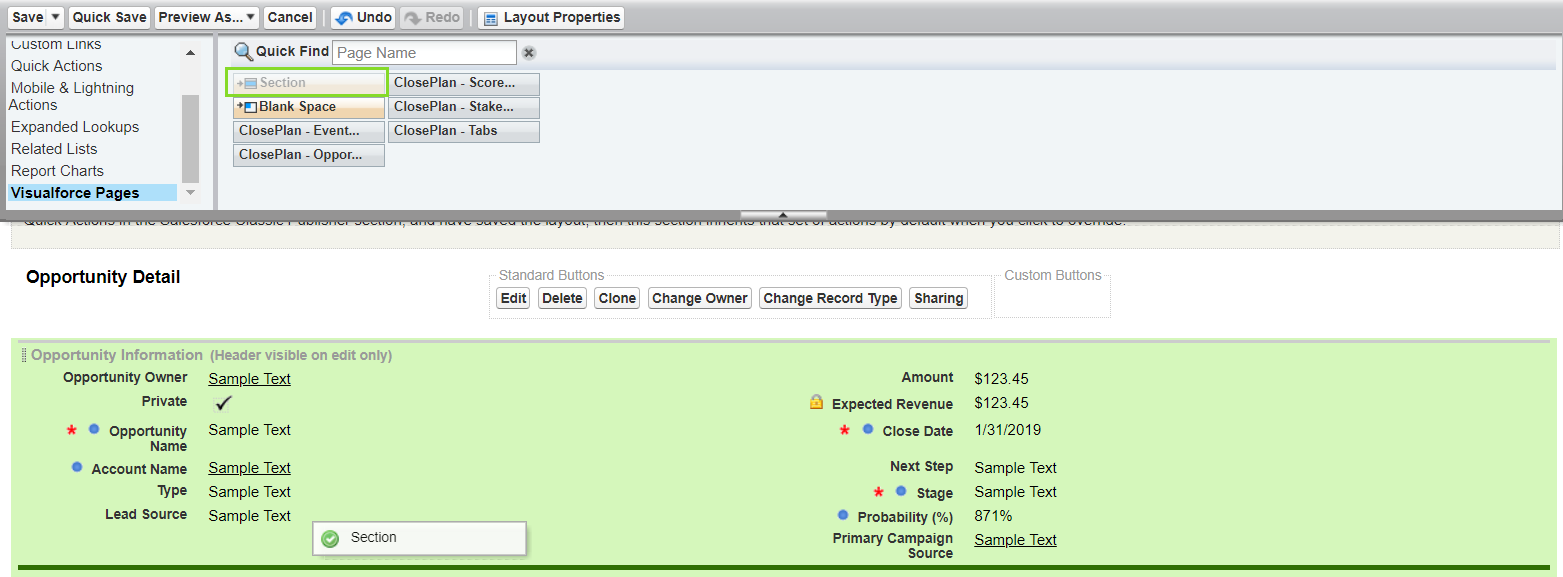
- In the top scroll menu, click on Visualforce Pages
- Drag down to the Opportunity Detail layout
- In the Section name enter ClosePlan > select 1-Column > click OK
- From top menu:
- For all 3 components (Playbook, Scorecard, Relationships maps) drag the
 column into the created ClosePlan section > click Properties
 in the ClosePlan - Tabs > set the Height to 600px > tick Show scrollbars > ok
- For all 3 components (Playbook, Scorecard, Relationships maps) drag the
- For Relationships Maps only, drag the ClosePlan - Stakeholder List column into the created ClosePlan section > click Properties in the ClosePlan > set the Height to 600px > tick Show scrollbars > ok
- For Playbook only, drag the ClosePlan - Event List column into the created ClosePlan section > click Properties > set the Height to 600px > tick Show scrollbars > ok
- For Scorecard only, drag the ClosePlan - Scorecard column into the created ClosePlan section > click Properties > set the Height to 600px > tick Show scrollbars > ok
- For Relationships Maps only, drag the ClosePlan - Stakeholder List column into the created ClosePlan section > click Properties

- Click Save at the top
If more Layout Configurations are needed for your organization, you will need to create each individually.