| Table of Contents |
|---|
...
Go to the gear icon and click Setup
In the Quick Find box enter App Manager > click on New Connected App
Connected App Name: ClosePlan Connected App
API Name: ClosePlanConnectedApp (NOTE: use this value exactly)
Contact Email: enter your email
Tick Enable OAuth Settings
Callback URL:
https://<<YOUR DOMAIN>>.my.salesforce.com/services/authcallback/ClosePlanMetadataAuthProvider
To find your domain, navigate to: Setup > Company Settings > My Domain
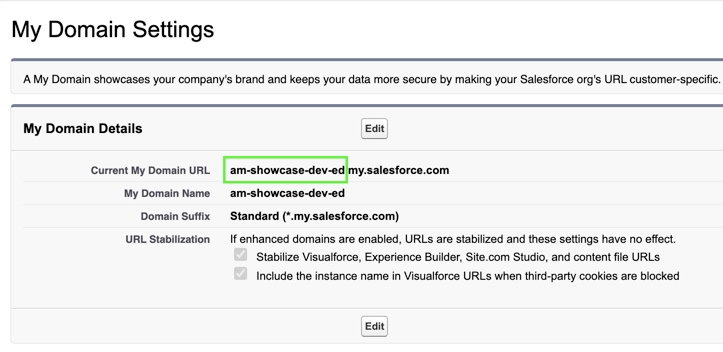
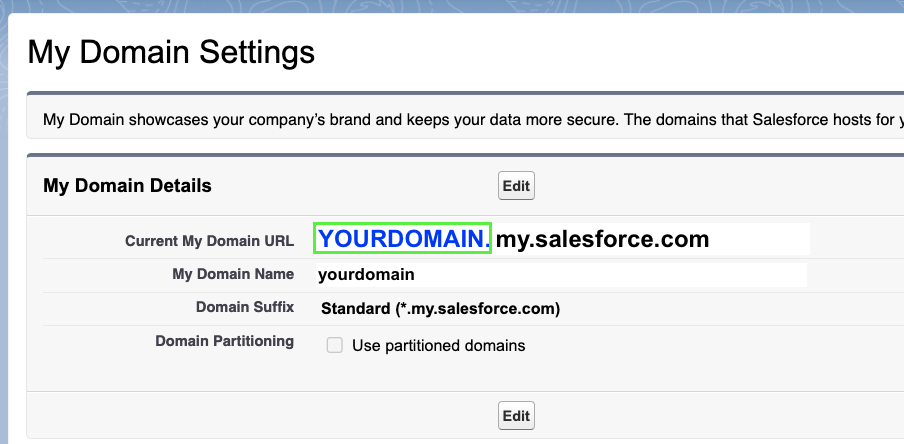
Or Look to the URL of the Salesforce Org:

Paste 'Your the domain name ' of the Org into the Callback URL instead of <<YOUR DOMAIN>>
E.g. https://amDD-showcase-dev-ed.my.salesforce.com/services/authcallback/ClosePlanMetadataAuthProvider
Selected OAuth Scopes:
Full Access (full)
Perform Request on your behalf at any time – or it may appear: Perform requests at any time(refresh_token, offline_access)
Click Save > then Continue
Click the Manage Consumer Details button and Verify your identity.
A new tab will open with the Consumer Key and Consumer Secret information.
Consumer Key and Consumer Secret will be needed for the next Step: 2. Create Auth Provider
...
Go to the gear icon and click Setup (this will open a new tab, which is what we want)
In the Quick Find box enter Auth. Providers and open it > click New button
Provider Type: Salesforce
Name: ClosePlan Metadata Auth Provider
URL Suffix: ClosePlanMetadataAuthProvider (NOTE: use this value exactly)
Note: If you have not done so already, return to the previous tab and click the Manage Consumer Details button to get the Consumer Key and Consumer Secret.
Verify your identity. A new tab will open with the information.
Consumer Key: Copy the Consumer Key and paste
Consumer Secret: Copy Consumer Secret and paste
Default Scopes: full refresh_token offline_access
Click Save and leave the tab open
You can find the Callback parameter in the bottom section. The Callback parameter must match Callback URL entered in step 1
3. Create Named Credentials
Go to the gear icon and click Setup (this will open a new tab, which is what we want)
In the Quick Find box enter Named Credentials > click the arrow next to the New button and select New Legacy.
Label: ClosePlan Metadata Service
Name: ClosePlanMetadataService (NOTE: use this value exactly)
URL: https://<<YOUR DOMAIN>>.my.salesforce.com
Enter the same domain name as you entered in the section Create New Connected App - Step 1
Identity Type: Named Principal
Authentication Protocol: OAuth 2.0
Authentication Provider: Select ClosePlan Metadata Auth Provider from list

Scope: full refresh_token offline_access
Enable Start Authentication Flow on Save (this will initiate authorization on save)
Enable Generate Authorization Header
Enable Allow Merge Fields in HTTP Body
Click Save, you will be redirected to the Salesforce Authorization dialog to Log in.
If there is an error (blank page), it usually means that changes from previous steps have not yet been propagated. If this is the case, edit the record again and save until you get to auth. dialog properly.
If auth. dialog does not appear within 30 minutes, it is possible that the callback url may be invalid/improperly entered.
Login through your credentials
...
4. Verifying Configuration
After configuring Connected App you can validate if its working by following steps:
Go to ClosePlan Admin > Environment > Relationships > Picklist Values
If you see the pick-list value configuration, everything is configured properly

| Info |
|---|
Connected application exists only to provide internal connection between the package and Salesforce Setup settings. In Salesforce Classic, the App would work without the Connected App, but since the introduction of Lightning, the connection to Salesforce Metadata API and UI API needs to have an authorized callout. The App is doing following through mentioned APIs:
In terms of security, there is no need to be worried. For more information see this article: Why does ClosePlan needs this configuration For any specific questions, please reach out to us at Support@People.ai |
...