| Table of Contents |
|---|
...
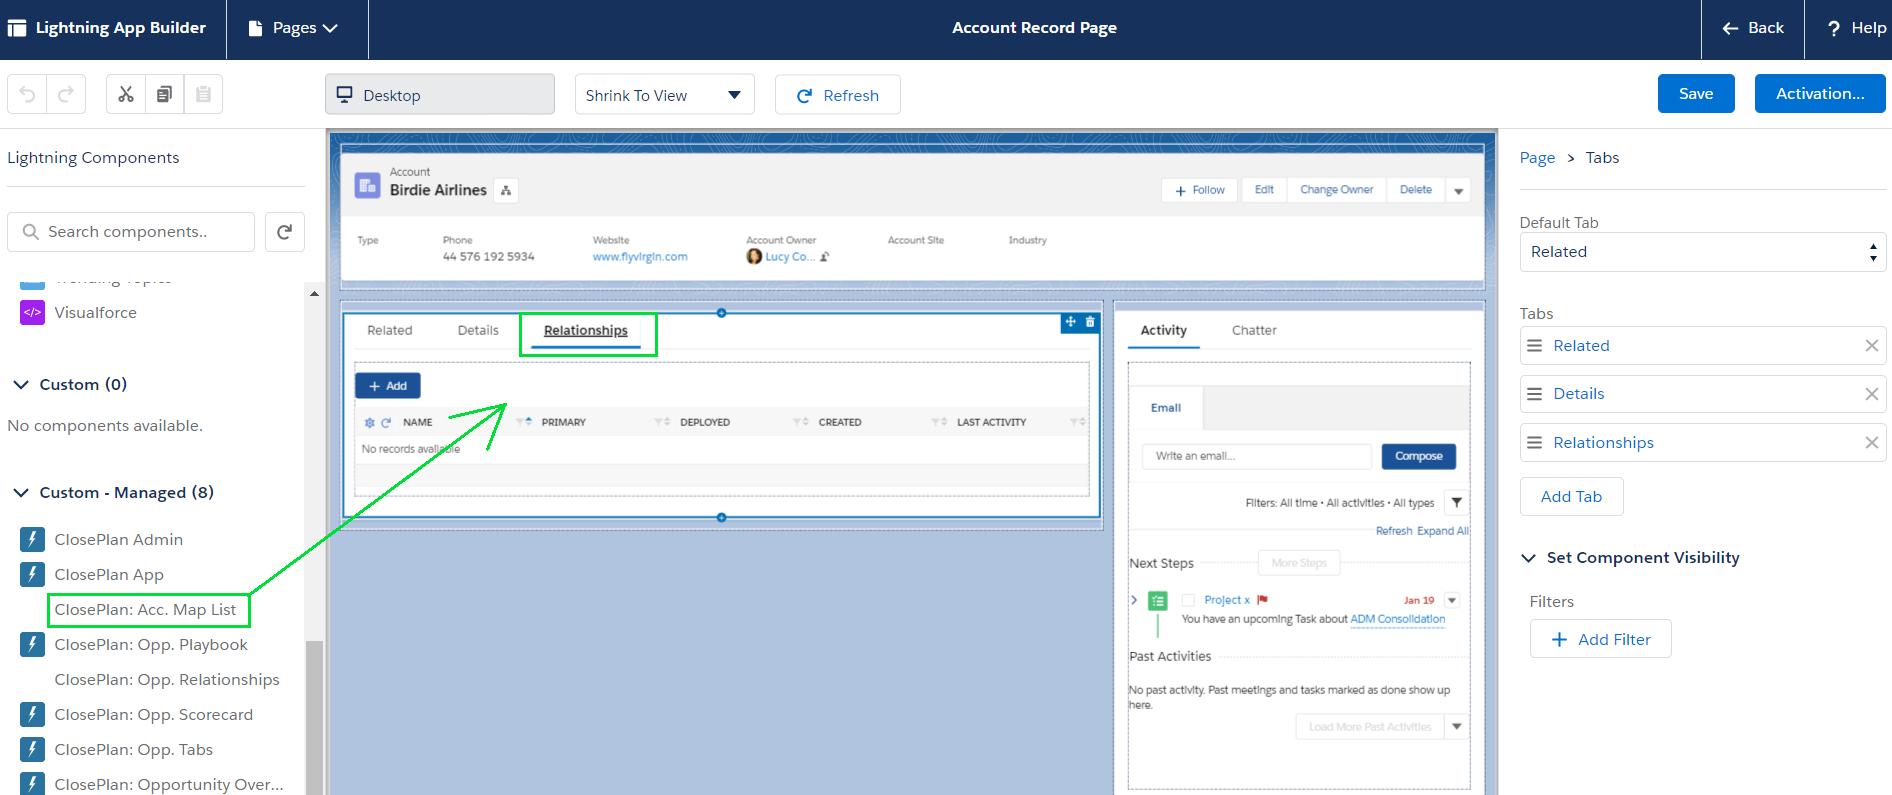
- Go to Account Tab > open any Account
- From the gear
 icon menu select Edit Page to open Lightning App Builder
 - In the page layout work space area, click on any existing Tab (e.g. Related, Details...)
- On the right side panel click the Add Tab button to create a new tab
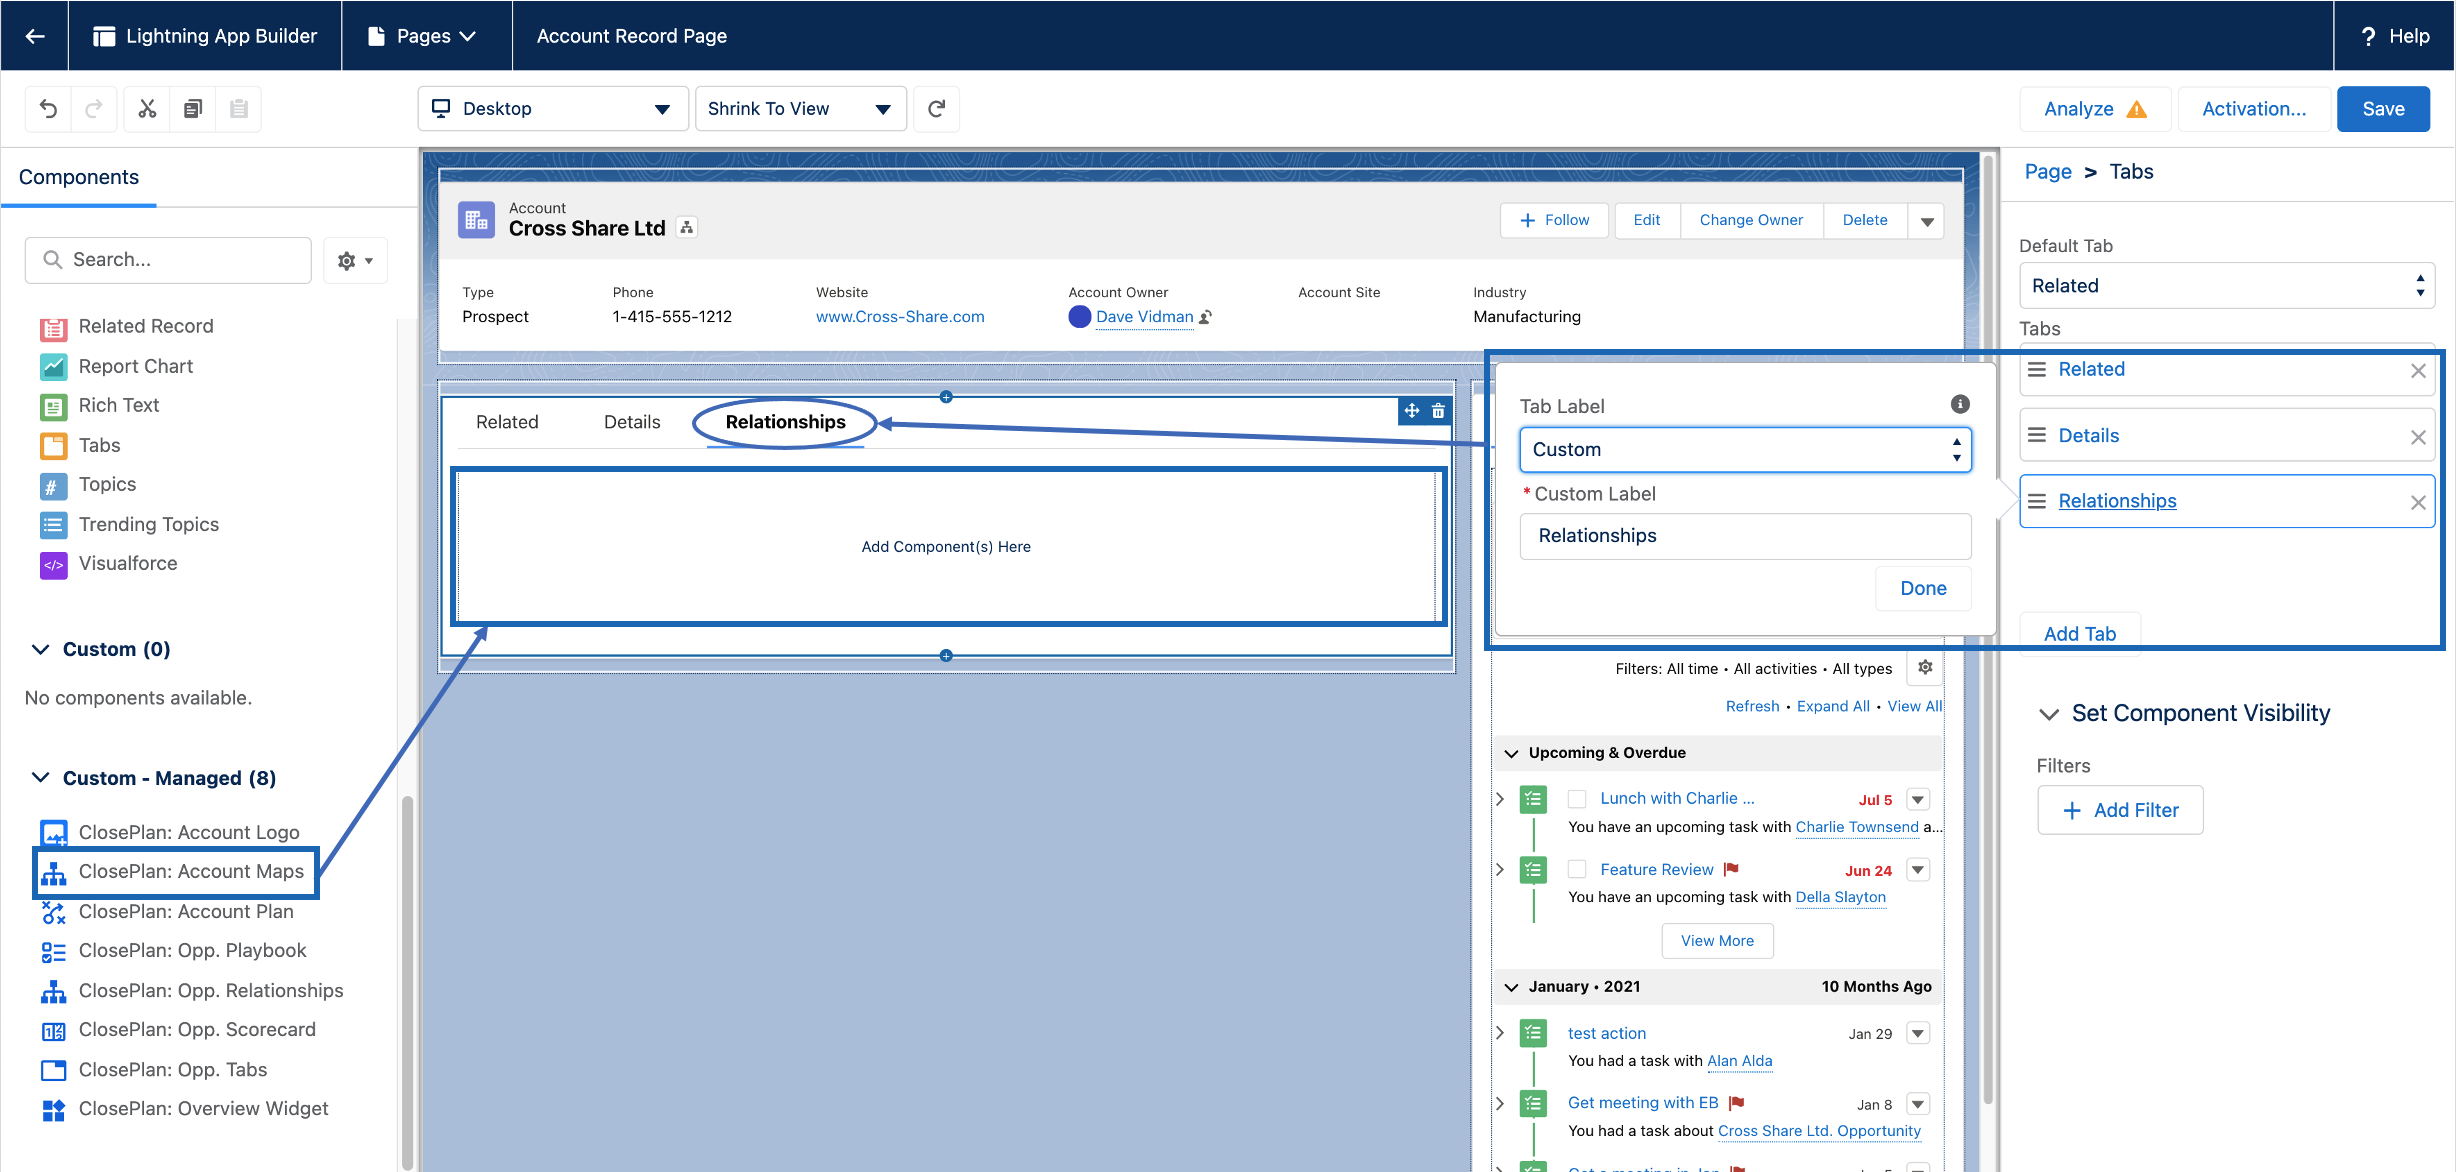
- Click on the newly added tab > On the right panel, Under Tabs click in the new Tab Label > select Custom > in the Custom Tab Label enter Relationships > click Done
- In the page layout work space area, the new 'Relationships' tab will appear > click on it
- Go to the left panel menu and in the section Custom - Managed find ClosePlan: Acc.Map ListAccount Maps
- Drag it into the Relationships tab layout
- Save the page
NOTE: You may also need to activate the page by clicking on Activate button > click Assign as Org Default > Save
Add Account Plan in Lightning
...
- Go to Account Tab > open any Account
- From the gearicon menu select Edit Page to open Lightning App Builder
- In the page layout work space area, click on any existing Tab (e.g. Related, Details...)
- On the right side panel click the Add Tab button to create a new tab
- Click on the new tab (It will be named 'Details' by default) > under Tab Label select Custom > in the Custom Label field enter Account Plan > click Done
- In the page layout work space area, the new 'Account Plan' tab will appear > click on it
- Go to the left panel menu and in the section Custom - Managed find ClosePlan Account Plan
- Drag it into the Account Plan tab layout
- Save the page

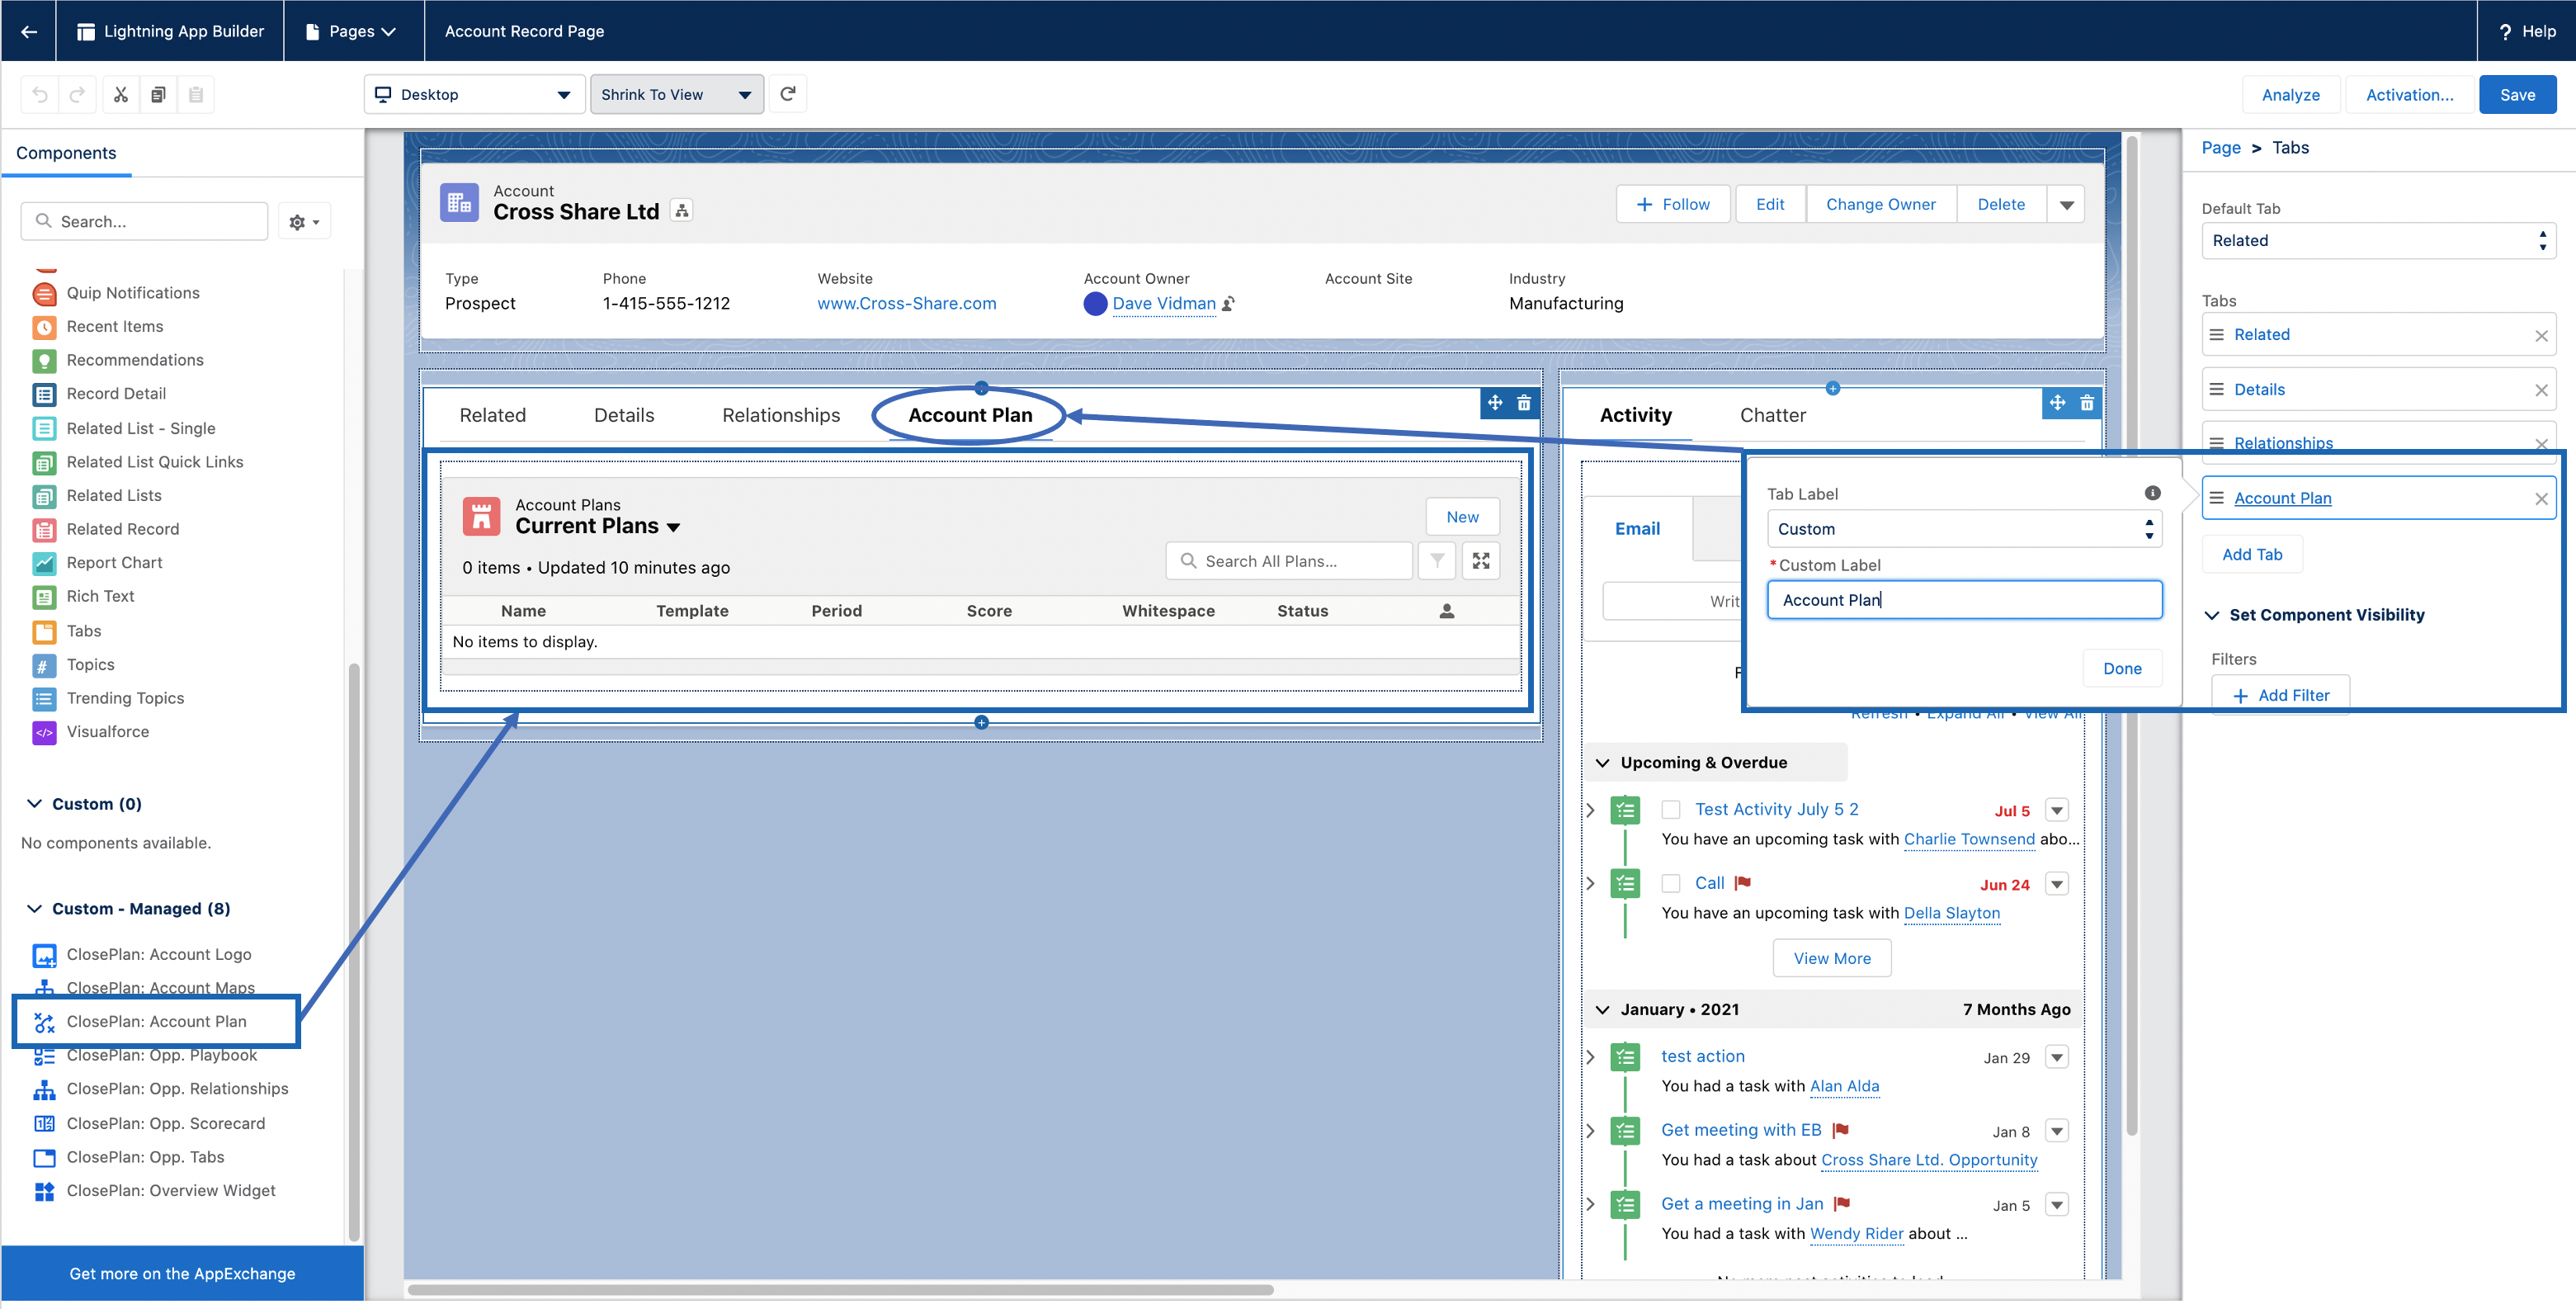
NOTE: You may be prompted to activate the page > click Assign as Org Default > Save
...
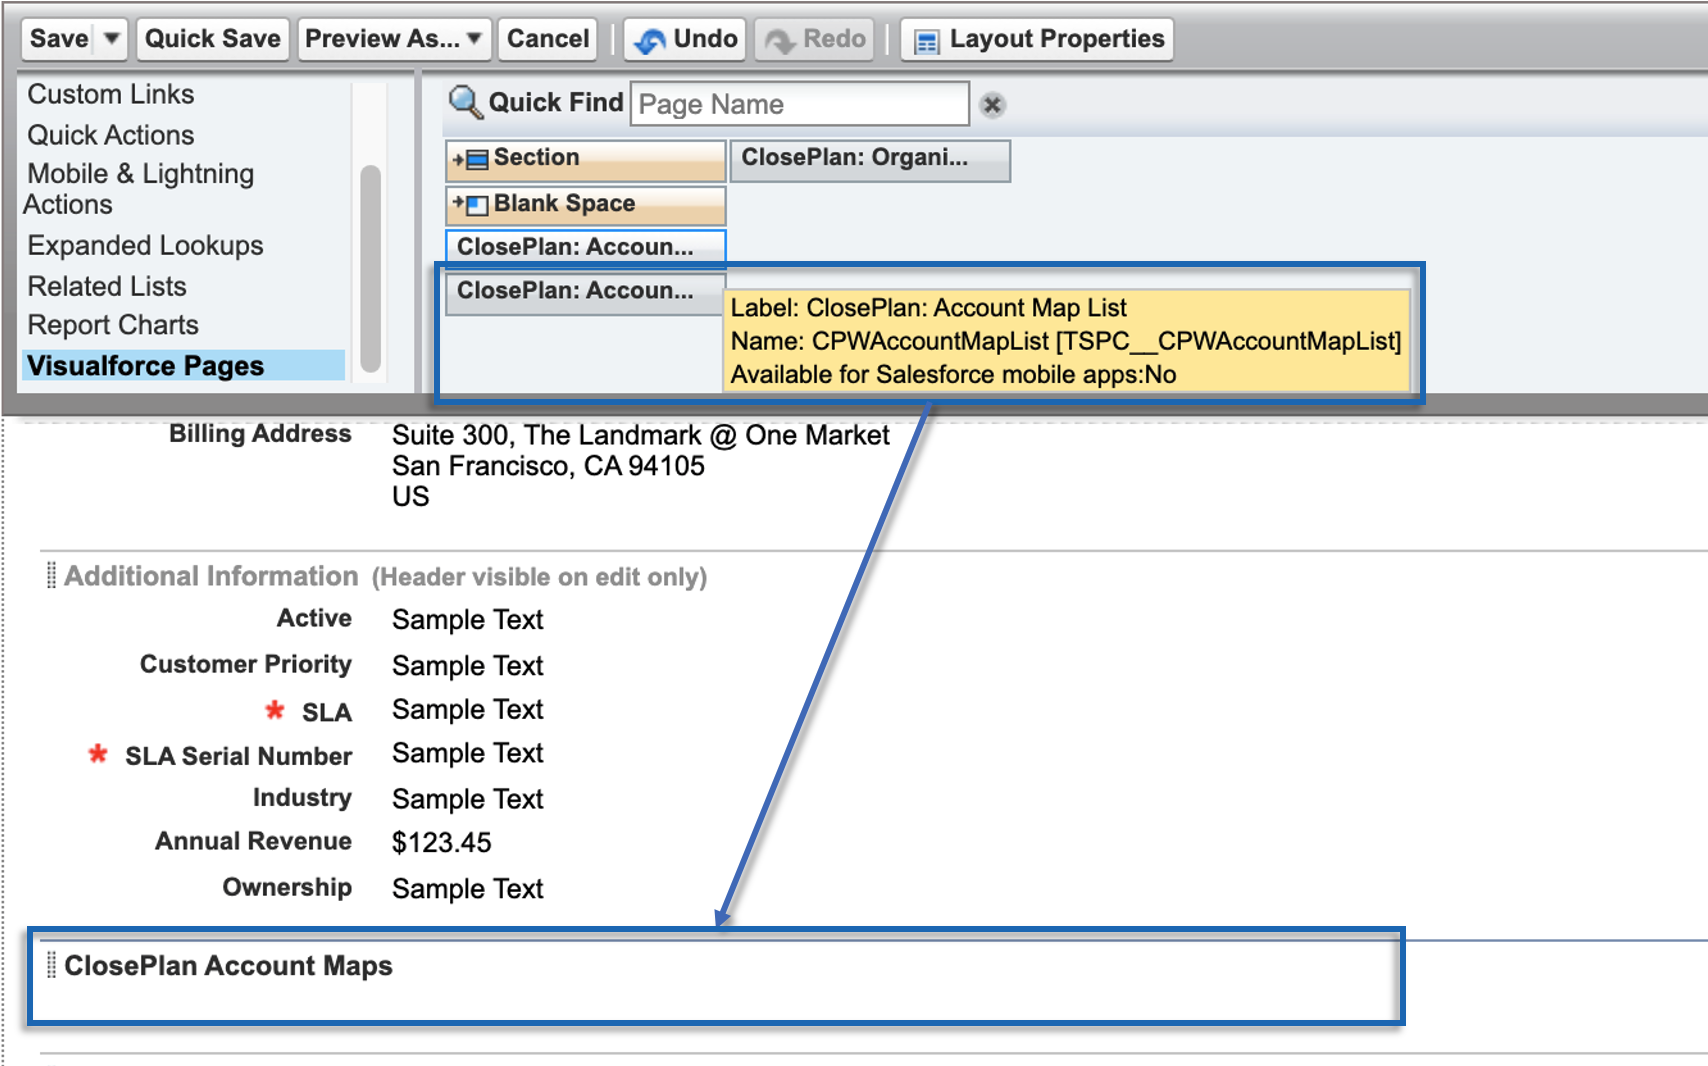
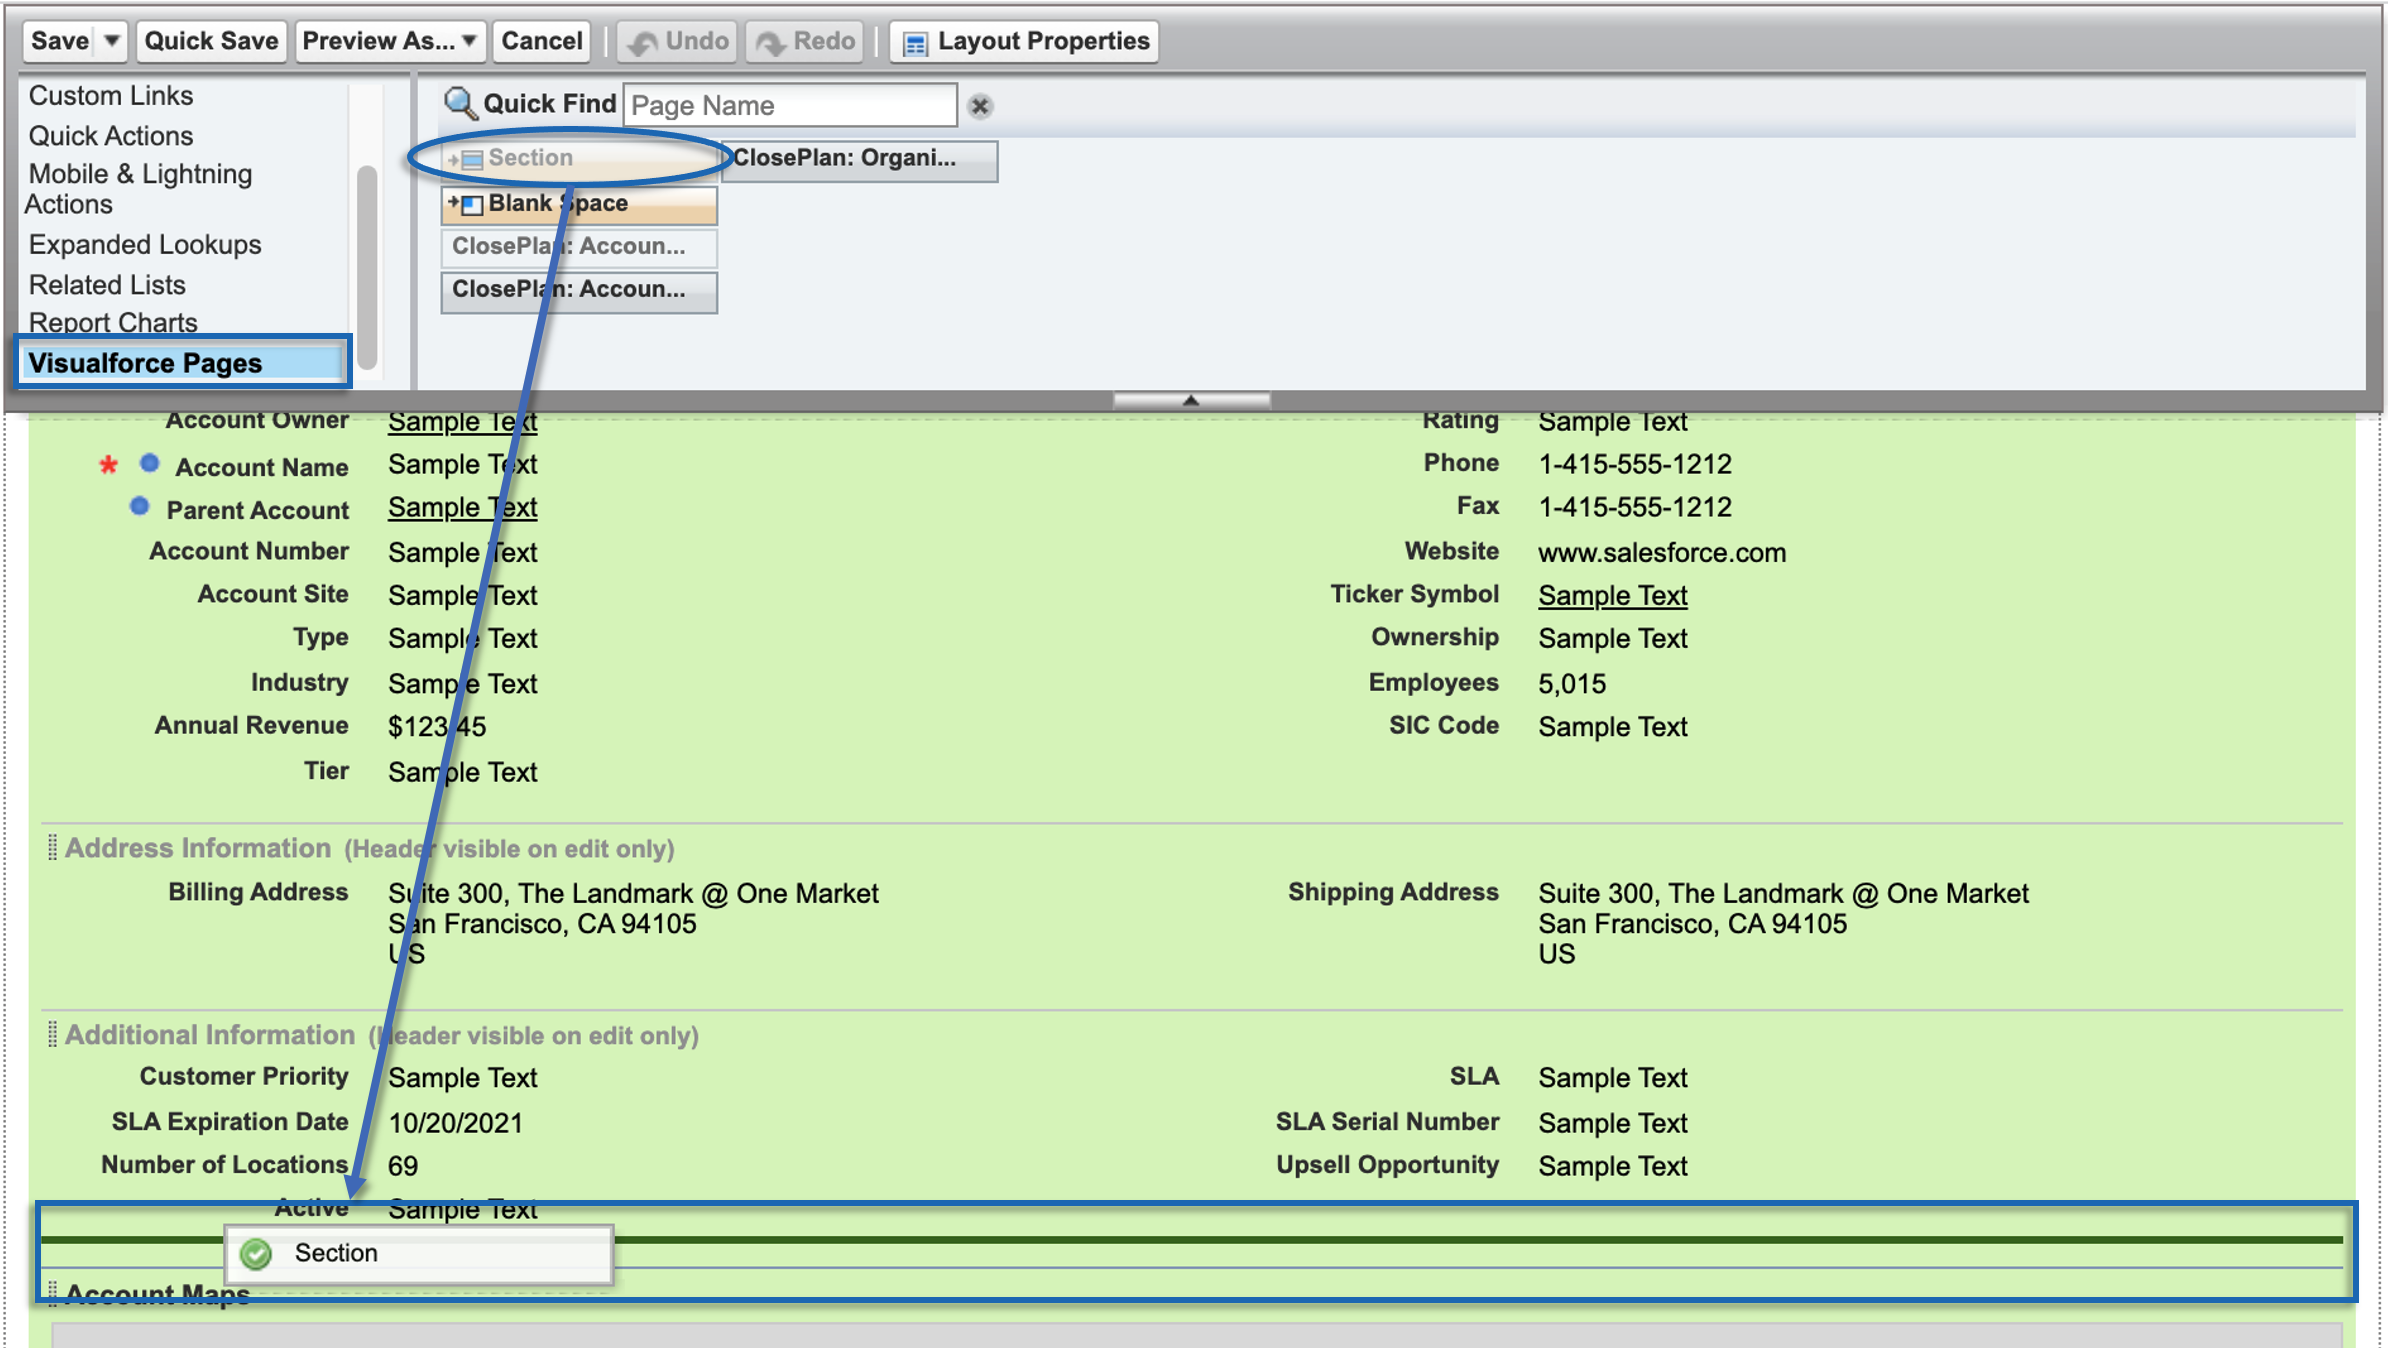
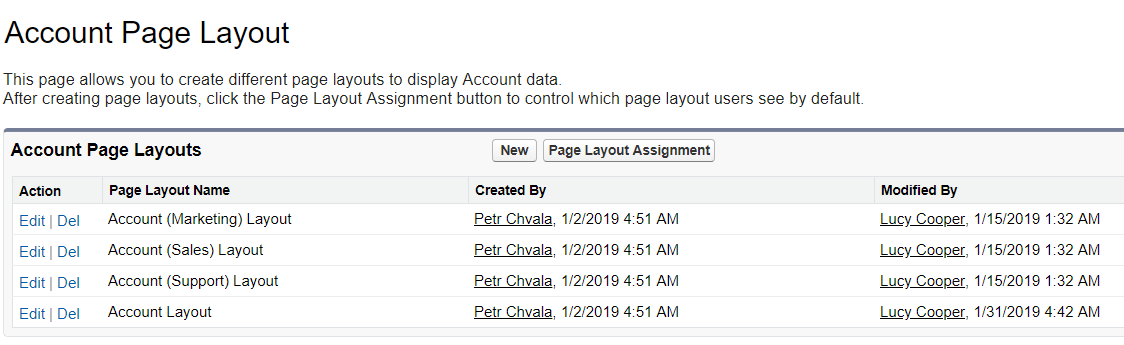
- Go to Setup > on the left panel, under Build open Customize > Accounts > Page Layouts
- Click Edit by your desired Account Layout
- In the top scroll menu, click on Visualforce Pages
- Drag
 down to the Account Detail layout or where you wish to have it
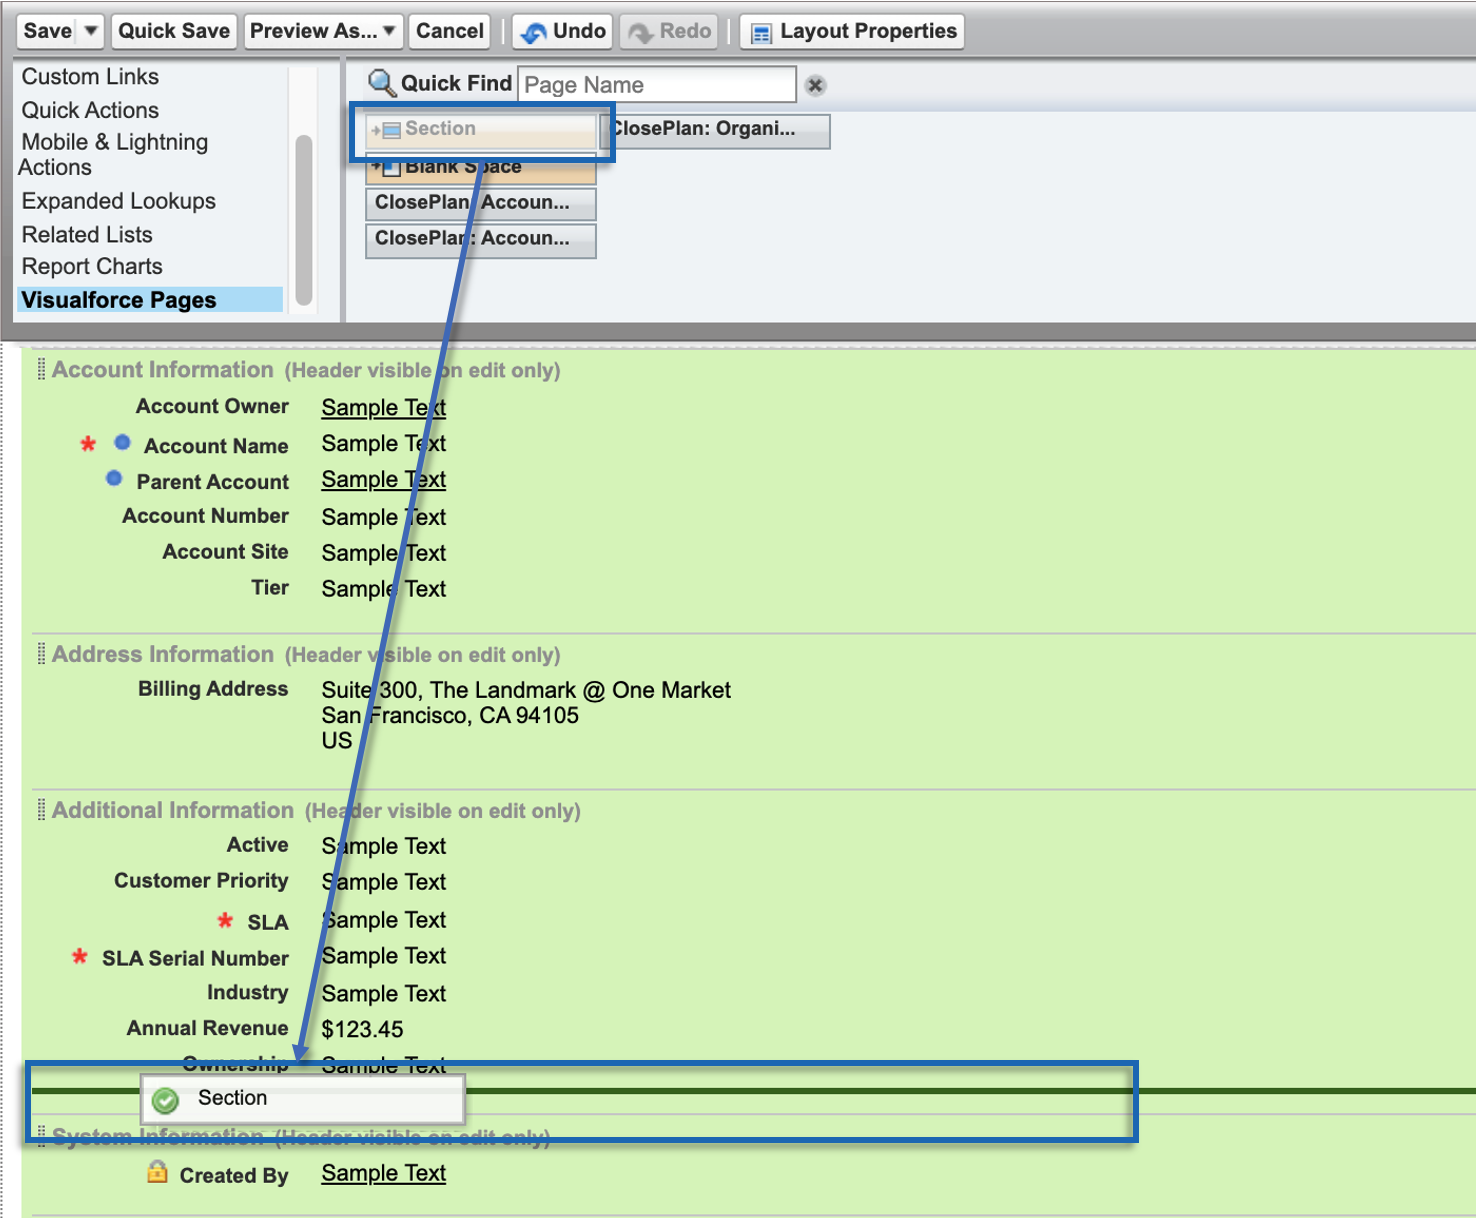
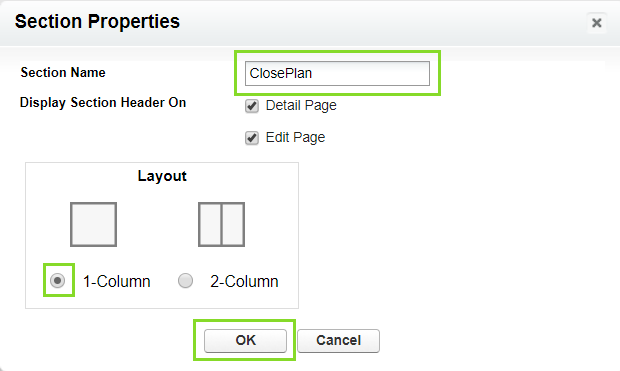
- In the Section Name enter ClosePlan Account Maps > select 1-Column > click OK

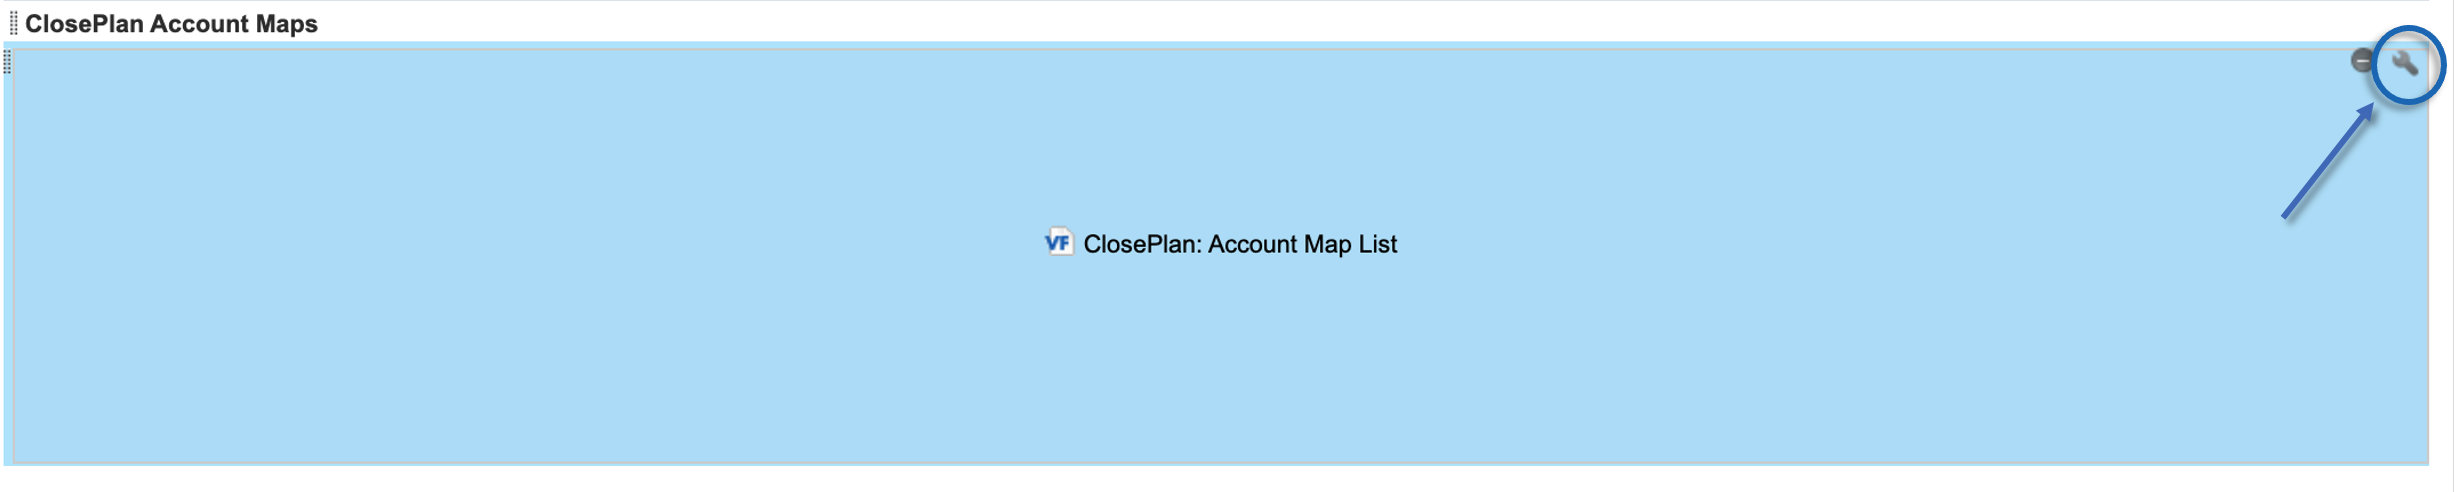
- Drag the component 'ClosePlan Account Map List' into the newly created section - ClosePlan Account Maps
- Click on the properties icon
- For Height enter e.g. 350
- Tick Show scrollbars and Ok
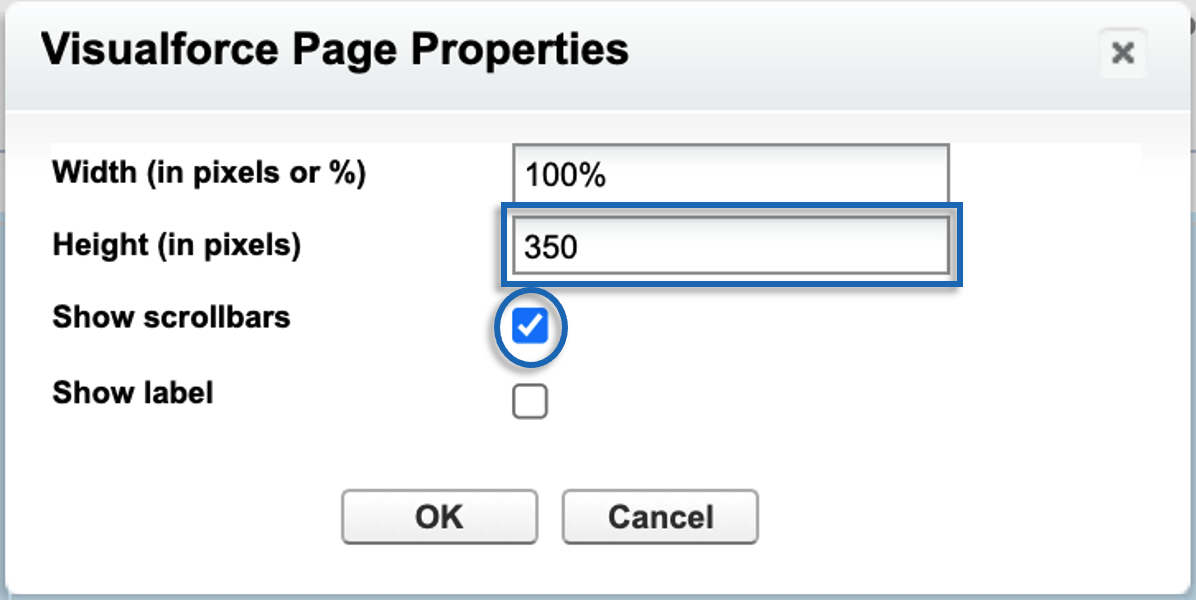
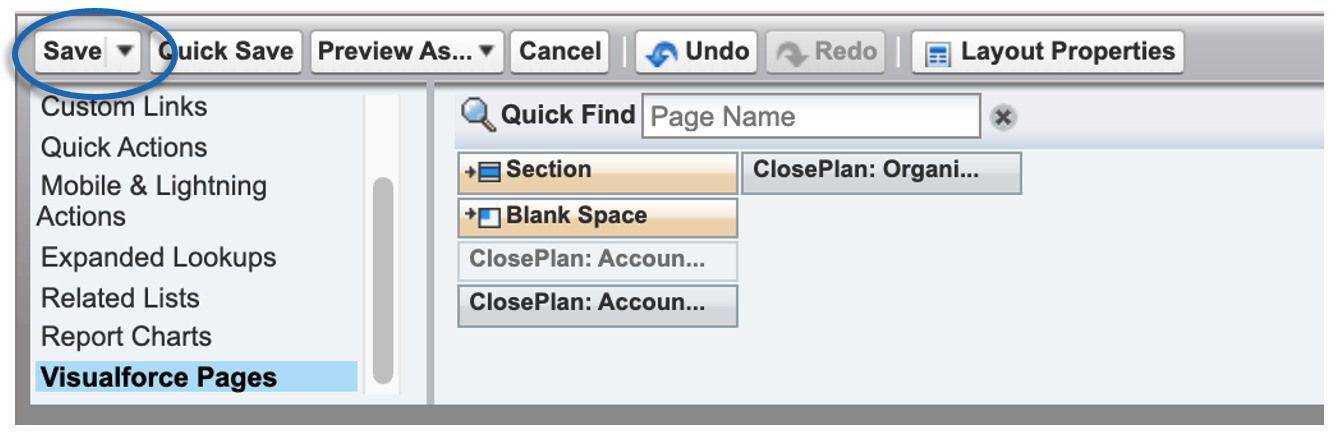
- Save it!
...
- Go to Setup > on the left panel, under Build open Customize > Accounts > Page Layouts
- Click Edit by your desired Account Layout
- In the top scroll menu, click on Visualforce Pages
- Drag down to the Account Detail layout or where you wish to have it
- In the Section Name enter Account Plan > select 1-Column > click OK
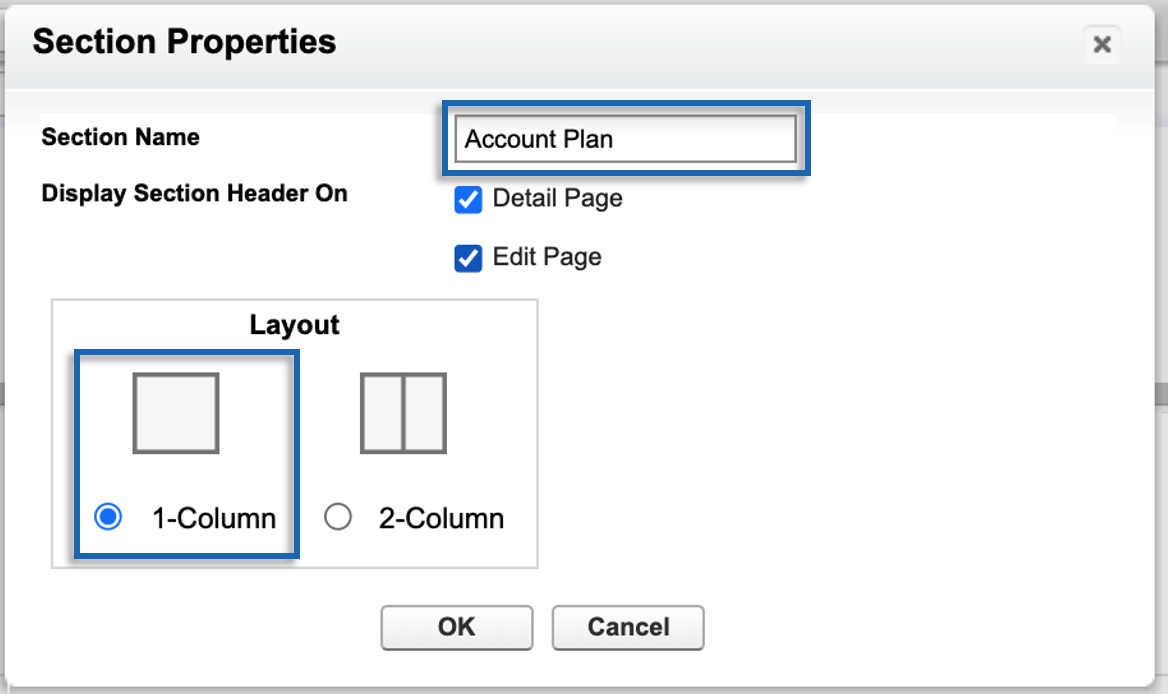
- Drag the component 'ClosePlan: Account Plan' into the newly created section - Account Plan
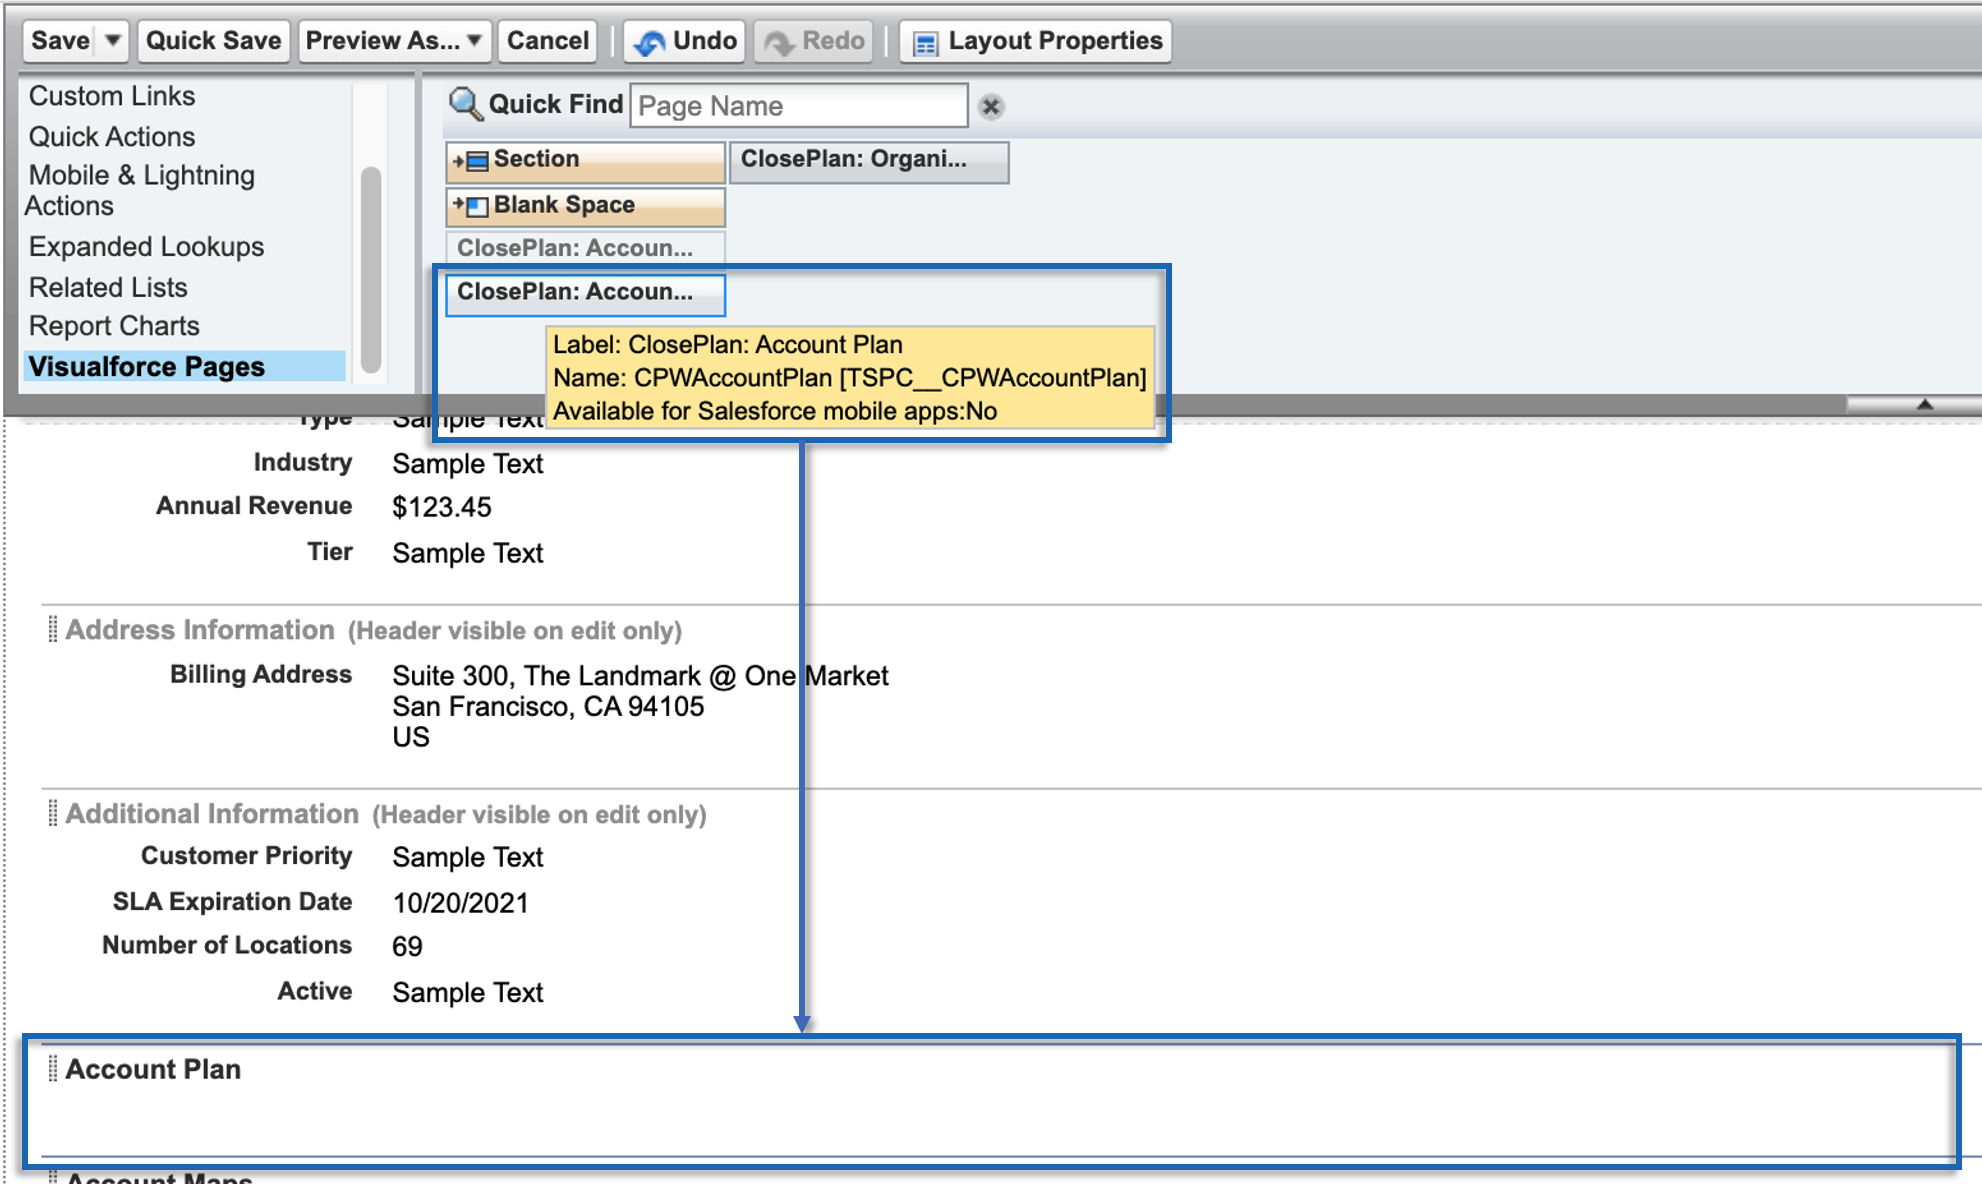
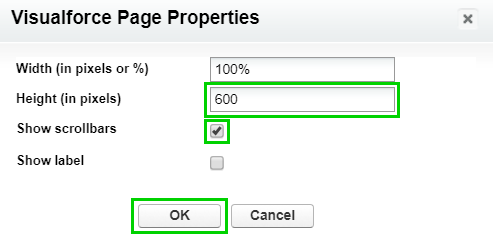
- Click on the properties icon

- For Height enter e.g. 600
- Tick Show scrollbars and Ok
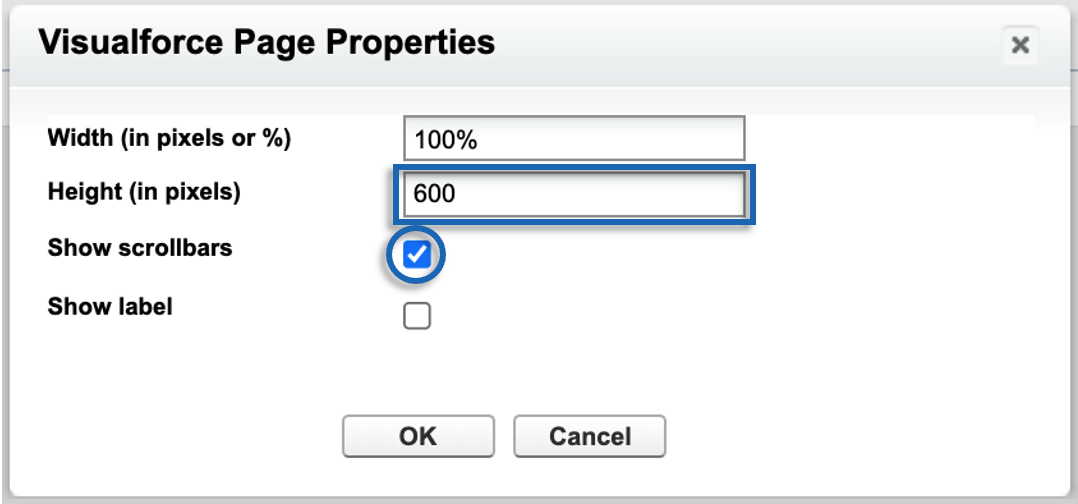
- Save it!
| Note |
|---|
If there are more Account layouts in your organization, you need to configure each separately.
|
Opportunity Page Layout Configuration - Add ClosePlan Overview, Playbook, Scorecard and Relationships
...
| Info |
|---|
The following steps are for the standard default view. Please note that your configuration can be customized to match your preferences. |
NOTE: Before adding ClosePlan features, confirm the features purchased in the line items of your ClosePlan Customer Order Form. Accordingly, configure only those components.
- Go to the Opportunity Tab and open any Opportunity
- From the gear
 icon menu select Edit Page to open Lightning App Builder
 - In the page layout work space area, click on any existing Tab (e.g. Related, Details...) > on the right side panel click Add Tab to create a new tab
...
Add ClosePlan Tabs (Playbook, Scorecard, Relationships) to Opportunity Page Layout in Classic
NOTE: Before adding ClosePlan features, confirm the features purchased in the line items of your ClosePlan Customer Order Form. Accordingly, configure only those components.
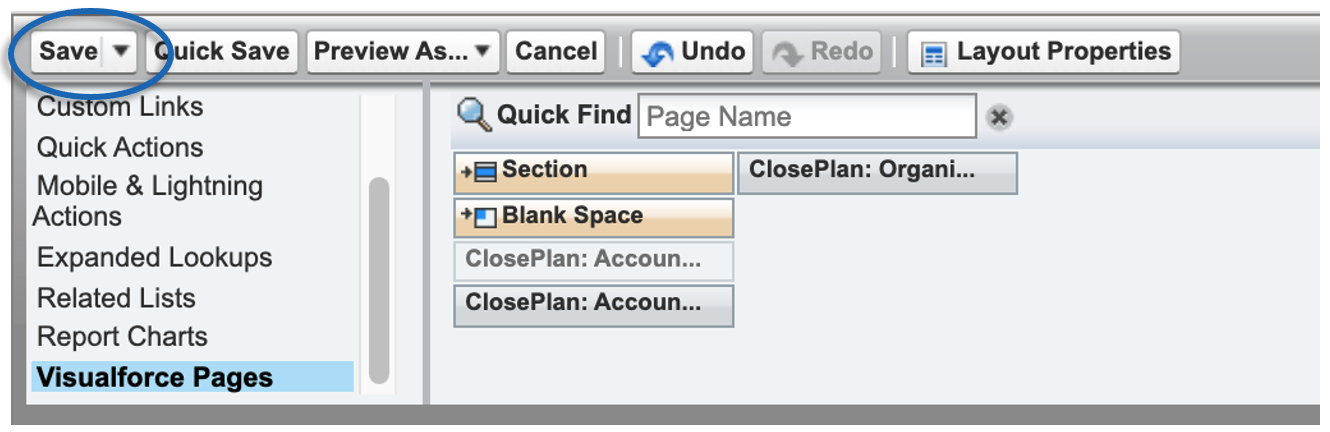
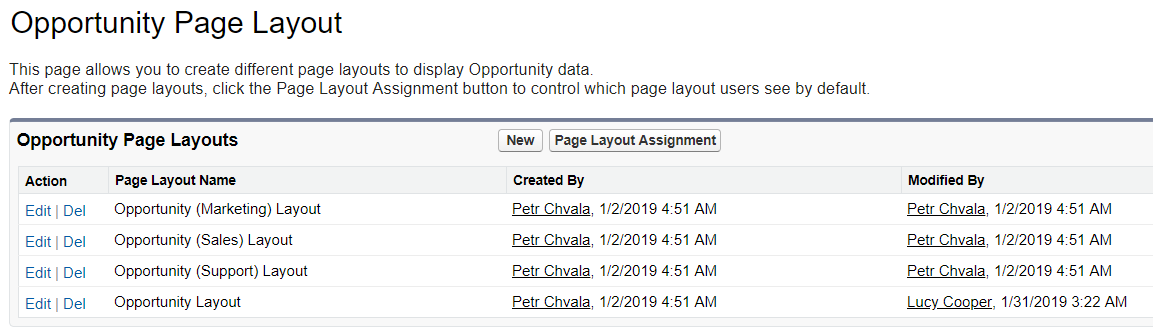
- Go to Setup > on the left panel under Build open Customize > Opportunities > Page Layouts
- Under Action, Click Edit for the Page Layout Name you want to edit
- In the top scroll menu, click on Visualforce Pages
- Drag down to the Opportunity Detail layout
- In the Section name enter ClosePlan > select 1-Column > click OK
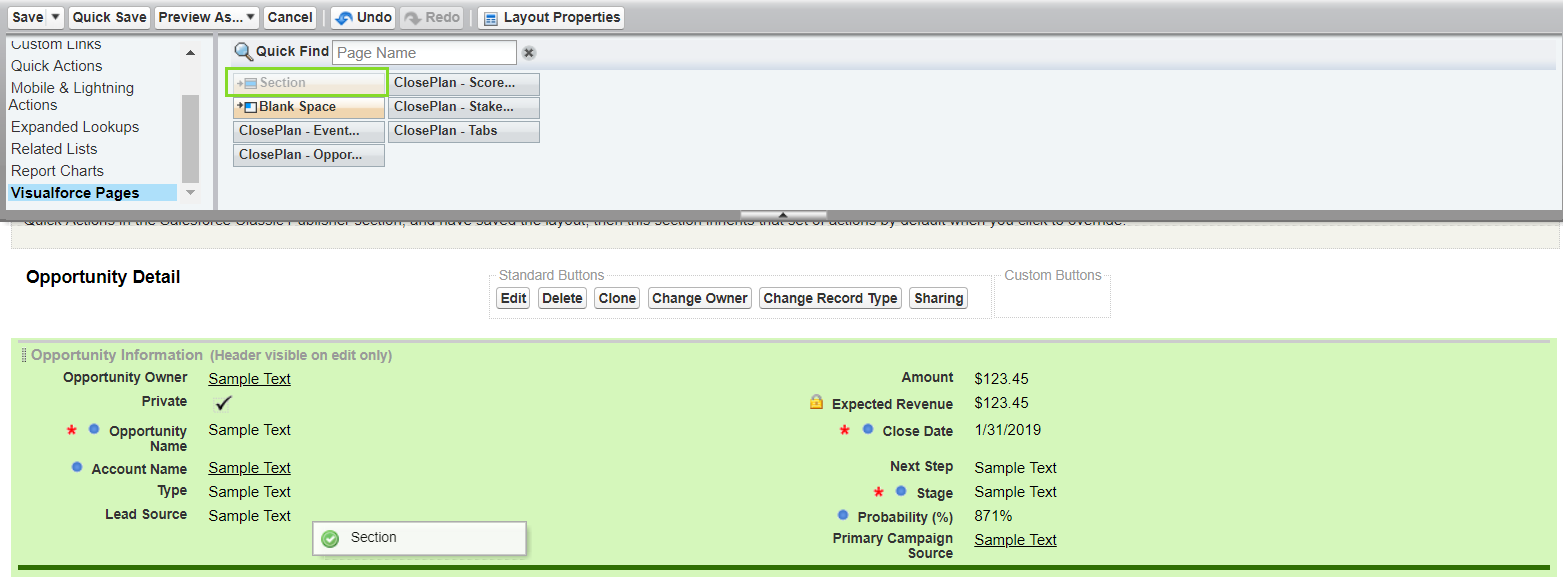
- From top menu:
- For all 3 components (Playbook, Scorecard, Relationships maps) drag the
 column into the created ClosePlan section > click Properties
  in the ClosePlan - Tabs > set the Height to 600px > tick Show scrollbars > ok
- For all 3 components (Playbook, Scorecard, Relationships maps) drag the
- For Relationships Maps only, drag the ClosePlan - Stakeholder List column into the created ClosePlan section > click Properties in the ClosePlan > set the Height to 600px > tick Show scrollbars > ok
- For Playbook only, drag the ClosePlan - Event List column into the created ClosePlan section > click Properties > set the Height to 600px > tick Show scrollbars > ok
- For Scorecard only, drag the ClosePlan - Scorecard column into the created ClosePlan section > click Properties > set the Height to 600px > tick Show scrollbars > ok
- For Relationships Maps only, drag the ClosePlan - Stakeholder List column into the created ClosePlan section > click Properties
- Click Save at the top
| Note |
|---|
If more Layout Configurations are needed for your organization, you will need to create each individually.
|
...